Description
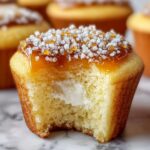
These Vanilla Bean Cheesecake Cupcakes are a delightful dessert featuring a creamy vanilla-scented cheesecake filling nestled in a buttery graham cracker crust. Perfectly portioned into cupcakes, they boast a rich texture balanced by fresh berries and a dollop of whipped cream, making them an irresistible treat for any occasion.
Ingredients
Scale
Crust
- 1 ½ cups graham cracker crumbs
- ½ cup unsalted butter, melted
- ¼ cup granulated sugar
- 1 teaspoon vanilla extract
Cheesecake Filling
- 16 oz cream cheese, softened
- ½ cup granulated sugar
- ½ cup sour cream
- 2 large eggs
- 1 tablespoon all-purpose flour
- 1 teaspoon vanilla extract
- 1 vanilla bean, split and seeds scraped
Toppings
- Whipped cream
- Fresh berries (strawberries, blueberries, raspberries)
- Chocolate shavings
Instructions
- Preheat Oven: Preheat your oven to 325°F (160°C). Line a standard muffin tin with cupcake liners to prepare for baking.
- Prepare Crust Mixture: In a medium bowl, combine the graham cracker crumbs, melted butter, granulated sugar, and vanilla extract. Mix until the crumbs are evenly coated and resemble wet sand.
- Form Crust: Press about 1 tablespoon of the crust mixture into the bottom of each cupcake liner, packing it down firmly to create a solid base.
- Bake Crust: Bake the crusts for 8-10 minutes, or until lightly golden. Remove from the oven and let them cool completely.
- Beat Cream Cheese: In a large mixing bowl, beat the softened cream cheese with an electric mixer on medium speed until smooth and creamy, about 2-3 minutes.
- Add Sugar: Add the granulated sugar and continue beating until well combined, scraping down the sides of the bowl to ensure even mixing.
- Incorporate Sour Cream: Mix in the sour cream fully to create a smooth filling base.
- Add Eggs: Add the eggs one at a time, mixing on low speed after each addition just until combined to prevent overmixing.
- Add Flour: Sprinkle in the all-purpose flour and mix gently until just combined to help stabilize the filling.
- Add Vanilla: Add the vanilla extract and the seeds scraped from the split vanilla bean, mixing until evenly incorporated for a rich vanilla flavor.
- Fill Cupcake Liners: Once the crusts have cooled, fill each cupcake liner with the cheesecake mixture, leaving about ¼ inch of space at the top to allow for slight rising.
- Remove Air Bubbles: Gently tap the muffin tin on the counter to release any trapped air bubbles in the mixture.
- Bake Cheesecake Cupcakes: Bake for 18-20 minutes, or until the edges are set but the centers still jiggle slightly when gently shaken.
- Cool in Oven: Turn off the oven and crack the door open, letting the cupcakes cool inside for about 30 minutes to avoid cracks.
- Cool and Chill: Remove the cupcakes from the oven and let cool completely at room temperature. Transfer to the refrigerator and chill for at least 2 hours or overnight for best results.
- Add Toppings: Once chilled, top each cupcake with a dollop of whipped cream, fresh berries, and optional chocolate shavings for a decorative and flavorful finish.
Notes
- Make sure the cream cheese is softened to room temperature for a smooth filling without lumps.
- Do not overmix the batter after adding eggs to prevent cracking during baking.
- Chilling the cupcakes overnight enhances flavor and texture.
- Use fresh berries of your choice to customize the topping and add natural sweetness.
- To avoid cracking, allow the cupcakes to cool gradually in the oven before removing.