
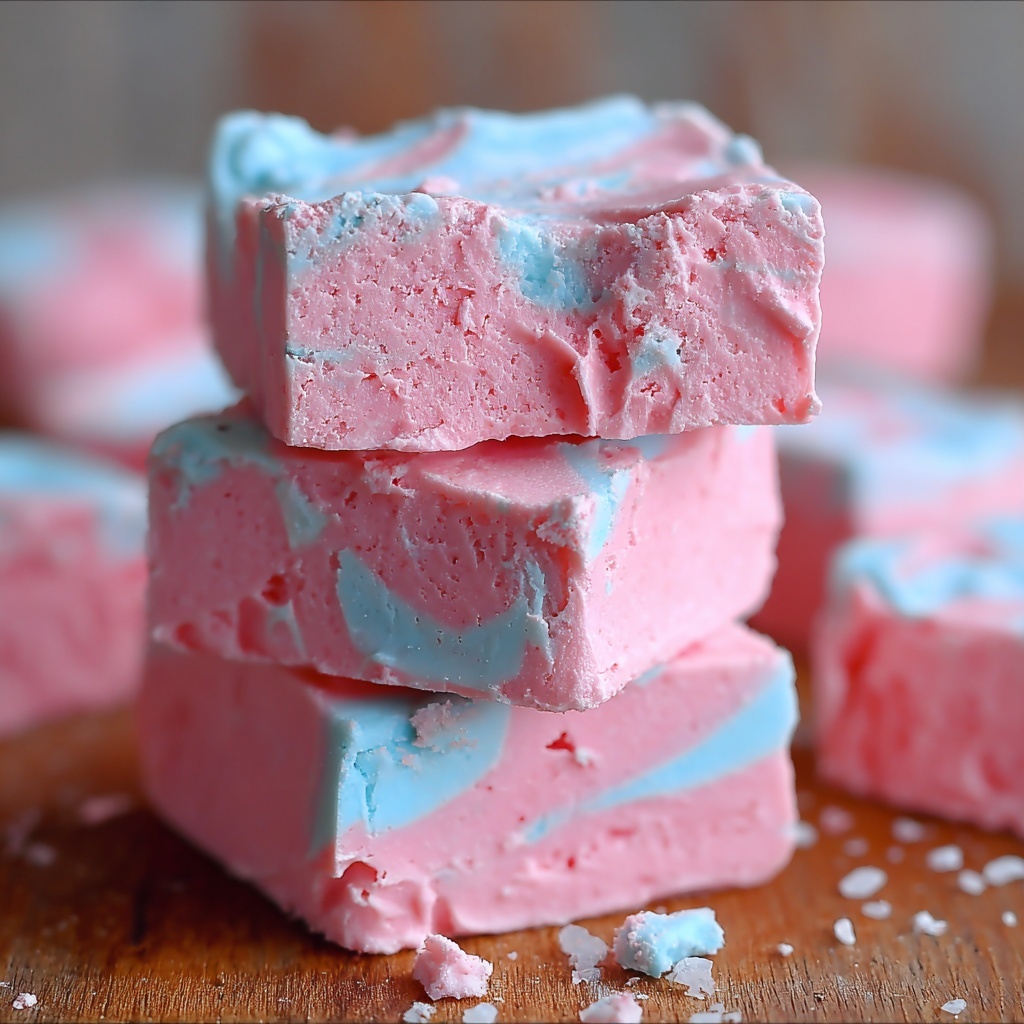
If you have a sweet tooth craving a delightful twist on a classic treat, this Cotton Candy Fudge Recipe is here to charm your taste buds and brighten your dessert table. Imagine creamy, melt-in-your-mouth fudge infused with the nostalgic flavor of cotton candy and swirls of pastel pink and blue that look almost too good to eat. It’s a magical combination of flavor and color that’s surprisingly simple to create, making it a perfect project for both seasoned bakers and enthusiastic beginners. Get ready to fall in love with this whimsical, colorful fudge that brings joy to every bite.
Ingredients You’ll Need
The magic of this fudge lies in its minimal yet purposeful ingredients. Each one plays a crucial role, whether it’s the smooth texture from sweetened condensed milk or the vibrant hues from food coloring gels. Here’s what you’ll need to bring this Cotton Candy Fudge Recipe to life:
- 24 oz white almond bark: Provides a creamy base that melts smoothly and mixes easily, allowing the fudge to set perfectly.
- 14 oz sweetened condensed milk: Adds richness and sweetness, ensuring a luscious, fudgy texture.
- Cotton candy flavoring: Infuses the fudge with that unmistakable carnival favorite taste that makes this recipe special.
- Light blue food coloring gel: Gives a soft pastel shade and helps create one half of the signature swirl.
- Light pink food coloring gel: Complements the blue with a sweet, candy-like color, completing the cotton candy look.
How to Make Cotton Candy Fudge Recipe
Step 1: Prepare the Pan
Start by lining an 8×8-inch pan with aluminum foil or parchment paper. This little step might seem simple, but it makes a huge difference when you’re ready to lift out your perfectly formed fudge squares without a fuss.
Step 2: Melt the Almond Bark
Place the white almond bark into a microwave-safe bowl and heat it in 30-second intervals. Stir after each burst to ensure it melts evenly without burning. Smooth, melted almond bark is the secret to that beautiful creamy texture in your fudge.
Step 3: Add Condensed Milk and Flavoring
Once the almond bark is silky and liquid, stir in the sweetened condensed milk and a generous amount of cotton candy flavoring. These combine to give the fudge its signature sweetness and nostalgic taste—you’ll start to feel like you’re at a fairground already!
Step 4: Divide and Color
Split the mixture evenly into two bowls. Add light blue food coloring gel to one, and light pink to the other. These soft pastel colors will give your fudge that dreamy cotton candy vibe, looking just as lovely as it tastes.
Step 5: Layer the Fudge
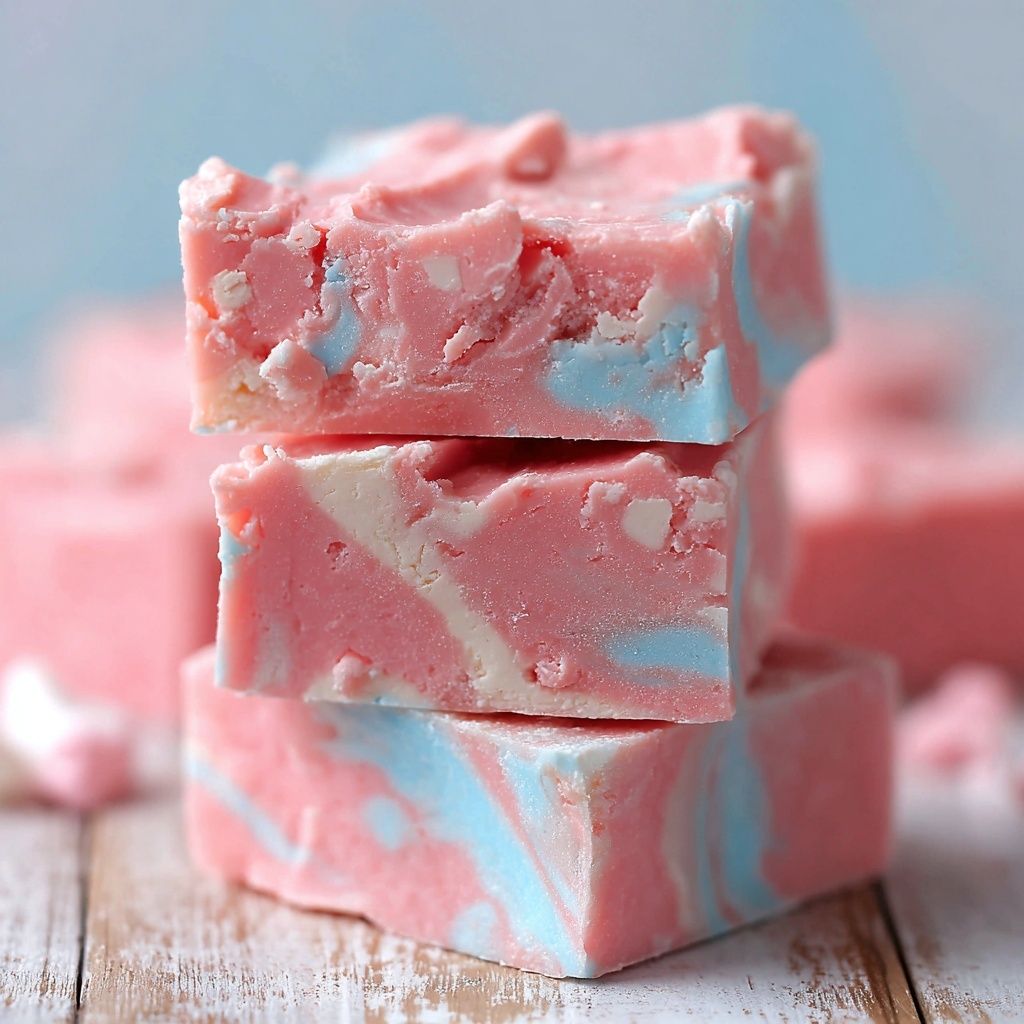
Scoop dollops of the colored fudge mixtures alternately into your prepared pan. This layering sets the stage for the pretty swirl effect that makes this Cotton Candy Fudge Recipe so visually stunning.
Step 6: Swirl the Colors
Take a toothpick and gently drag through the pink and blue layers to create a beautiful marbled pattern. Don’t overdo it—just enough swirling to blend colors while keeping that enchanting cotton candy look.
Step 7: Refrigerate
Pop the pan into the refrigerator for at least two hours. The chill hardens the fudge nicely so when you cut it into squares, they hold their shape and have the perfect bite.
Step 8: Serve
Once set, lift the fudge out, peel off the foil or parchment, and slice into delicious squares. Now you’re ready to share this colorful, dreamy treat or keep it all to yourself for those special sweet moments.
How to Serve Cotton Candy Fudge Recipe
Garnishes
Try dusting your fudge squares with a sprinkle of edible glitter or tiny pastel sprinkles to enhance that playful carnival feeling. A light dusting adds shimmer, making each bite even more enticing and picture-perfect.
Side Dishes
This fudge pairs wonderfully with a scoop of vanilla ice cream or a cup of hot cocoa. The creamy, sweet fudge balances beautifully with the warmth and richness of these comforting sides, offering a delightful dessert experience.
Creative Ways to Present
For a fun twist, stack your fudge squares in a tiered dessert tray or wrap individual pieces in colorful cellophane tied with pastel ribbons. These little touches make the fudge perfect for parties, gift-giving, or just a special treat that feels like a celebration.
Make Ahead and Storage
Storing Leftovers
Keep any leftover fudge in an airtight container at room temperature for up to a week. This helps maintain its soft yet firm texture, so each bite stays just as delicious as the first.
Freezing
If you want to enjoy your Cotton Candy Fudge Recipe later, wrap pieces individually in plastic wrap and freeze them in an airtight container. Thaw at room temperature before serving for the freshest taste and texture.
Reheating
Generally, fudge is best enjoyed chilled or at room temperature. If you prefer it softer, you can leave it out of the fridge for a little while. Avoid microwaving as it could alter the smooth consistency and vibrant colors.
FAQs
Can I use regular white chocolate instead of almond bark?
Regular white chocolate can work, but almond bark melts more smoothly and sets faster, making it ideal for this fudge. If using white chocolate, be sure to stir carefully to prevent burning.
How strong is the cotton candy flavor? Can I adjust it?
You can adjust the amount of cotton candy flavoring to suit your taste. Start with the recommended amount and add more if you prefer a stronger, more nostalgic flavor.
Can I make this fudge without food coloring?
Absolutely! The fudge will still taste fantastic without the colors, but the visual fun and cotton candy charm come from those pretty blue and pink swirls.
Is this fudge suitable for gifting?
Definitely! Wrapped beautifully, the Cotton Candy Fudge Recipe makes a charming homemade gift that’s both delicious and visually delightful.
How long does the fudge stay fresh?
Stored properly in an airtight container, fudge typically stays fresh for up to a week at room temperature and up to a month if frozen.
Final Thoughts
There’s something truly joyful about making and sharing this Cotton Candy Fudge Recipe. Whether you’re treating yourself or impressing friends with a colorful homemade delight, each luscious bite feels like a celebration. Go ahead, dive into this simple, sweet adventure and bring a little carnival magic to your kitchen!
Print
Cotton Candy Fudge Recipe
- Prep Time: 15 minutes
- Cook Time: 10 minutes
- Total Time: 2 hours 25 minutes
- Yield: 25 servings
- Category: Dessert
- Method: No-Cook
- Cuisine: American
- Diet: Vegetarian
Description
This Cotton Candy Fudge is a delightful, colorful treat combining creamy white almond bark and sweetened condensed milk infused with cotton candy flavoring. The fudge features beautiful pink and blue swirls, creating a fun marbled effect that’s perfect for parties or gifting. With a smooth, creamy texture and a sweet, nostalgic flavor, it’s an easy no-bake dessert that sets quickly in the fridge.
Ingredients
Fudge Base
- 24 oz white almond bark
- 14 oz sweetened condensed milk
- 1 tsp cotton candy flavoring
Coloring
- Light blue food coloring gel (a few drops)
- Light pink food coloring gel (a few drops)
Instructions
- Prepare the Pan: Line an 8×8-inch pan with aluminum foil or parchment paper to prevent sticking and make it easier to remove the fudge once set.
- Melt the Almond Bark: Place the white almond bark in a microwave-safe bowl and microwave in 30-second intervals, stirring frequently to ensure it melts evenly without burning, until completely smooth.
- Add Condensed Milk and Flavoring: Stir the sweetened condensed milk and cotton candy flavoring into the melted almond bark until the mixture is fully combined and smooth.
- Divide and Color: Split the fudge mixture evenly into two separate bowls. Add a few drops of light blue food coloring gel to one bowl and a few drops of light pink food coloring gel to the other, stirring each until the color is uniform.
- Layer the Fudge: Spoon the blue and pink fudge mixtures alternately into the prepared pan, layering them in small spoonfuls to form a colorful pattern.
- Swirl the Colors: Using a toothpick or skewer, gently swirl the two colors together to create a marbled cotton candy effect throughout the fudge.
- Refrigerate: Place the pan in the refrigerator for at least 2 hours or until the fudge is firm and fully set.
- Serve: Once set, remove the fudge from the pan using the foil or parchment overhang, cut into 25 small squares, and enjoy your visually stunning and delicious cotton candy fudge.
Notes
- Use a microwave-safe bowl and stir frequently to avoid burning the almond bark.
- You can substitute cotton candy flavoring with vanilla or another preferred flavor if unavailable.
- Store fudge in an airtight container in the refrigerator for up to two weeks.
- For easier removal, allow the fudge to come to room temperature for a few minutes before cutting.
- The quantity yields approximately 25 small squares of fudge.


