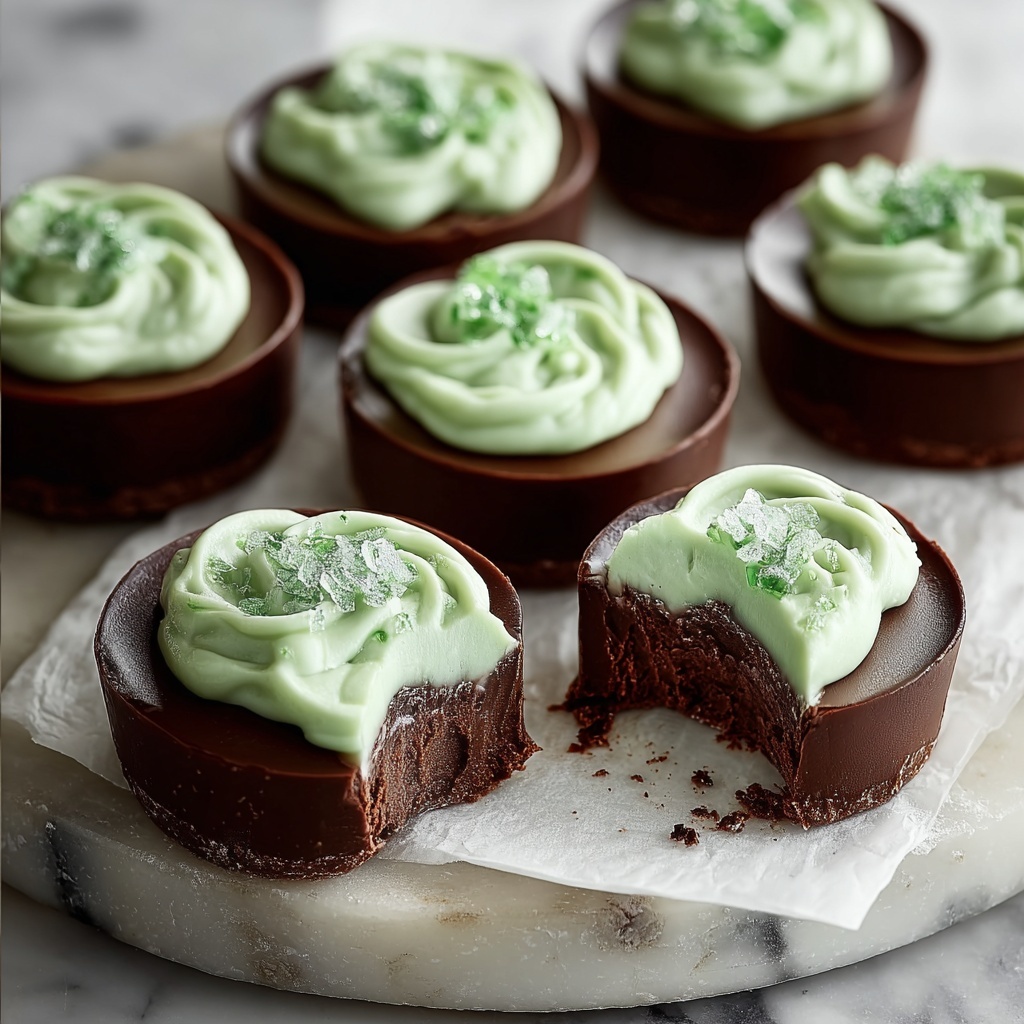
If you have a sweet tooth and a fondness for that perfect blend of refreshing mint and rich chocolate, then you’re absolutely going to love this Chocolate Mint Creams Recipe. These little bites of heaven are smooth and creamy on the inside with a luscious chocolate coating on the outside. They’re wonderfully simple to make but feel so indulgent—whether for a special occasion or just a cozy night in, these creams are sure to become your new favorite treat to whip up and share.
Ingredients You’ll Need
Gathering the right ingredients is the first step toward creating perfect Chocolate Mint Creams. Each one plays a crucial role—from the silky smoothness of the chocolate to the zing of peppermint that makes these creams uniquely refreshing.
- Semisweet chocolate chips (2 cups): These provide the rich, deep chocolate coating that’s neither too bitter nor too sweet, balancing perfectly with the mint center.
- Shortening (2 tablespoons): Helps the chocolate melt smoothly and gives a nice glossy finish to your creams.
- Peppermint extract (2 teaspoons): The star flavor that brings that classic cool and fresh mint taste everyone loves.
- Confectioners’ sugar (2 cups): Sweetens and stabilizes the mint cream center for a smooth, melt-in-your-mouth texture.
- Water (2 tablespoons): Combines with the sugar to create the creamy consistency needed for shaping the centers.
- Green food coloring (optional): Adds a festive touch, making your creams look as good as they taste.
How to Make Chocolate Mint Creams Recipe
Step 1: Melt the Chocolate
Start by melting the semisweet chocolate chips together with the shortening in a microwave-safe bowl. Heat them in 30-second bursts, stirring each time until the mixture becomes glossy and smooth. This step is key to getting that perfect chocolate shell that will coat your creams beautifully.
Step 2: Add Peppermint
Once your chocolate mixture is smooth and melted, stir in the peppermint extract. This is where the magic begins—the extract infuses the chocolate with that unmistakable fresh mint aroma that makes these creams irresistible.
Step 3: Form Cream Centers
In a separate bowl, mix together the confectioners’ sugar, water, and if you’re feeling festive, a few drops of green food coloring. Stir until the mixture is smooth and shiny. This will be the creamy mint filling that contrasts perfectly with the chocolate shell.
Step 4: Shape Creams
Take small portions of your mint mixture—about a teaspoon each—and roll them into tiny balls. Then gently flatten each ball into a small disc. Place these on waxed paper, and pop them in the refrigerator to firm up. This chilling step helps the creams keep their shape when coated.
Step 5: Coat with Chocolate
Using a fork, dip each chilled mint cream into the melted chocolate, letting the excess drip off before placing the coated creams back on the waxed paper. This is where patience pays off—the thin, even chocolate coating adds that elegant finish and delicious crunch.
Step 6: Chill and Serve
Finally, refrigerate the chocolate-coated creams until the chocolate hardens completely. Once set, they’re ready to be enjoyed! Store any extras in an airtight container in the refrigerator to keep them fresh and perfectly firm.
How to Serve Chocolate Mint Creams Recipe
Garnishes
For an extra special touch, sprinkle your Chocolate Mint Creams with crushed candy canes or finely grated dark chocolate. Not only do these additions add texture, but they also enhance the festive look, making your treats truly irresistible on any dessert tray.
Side Dishes
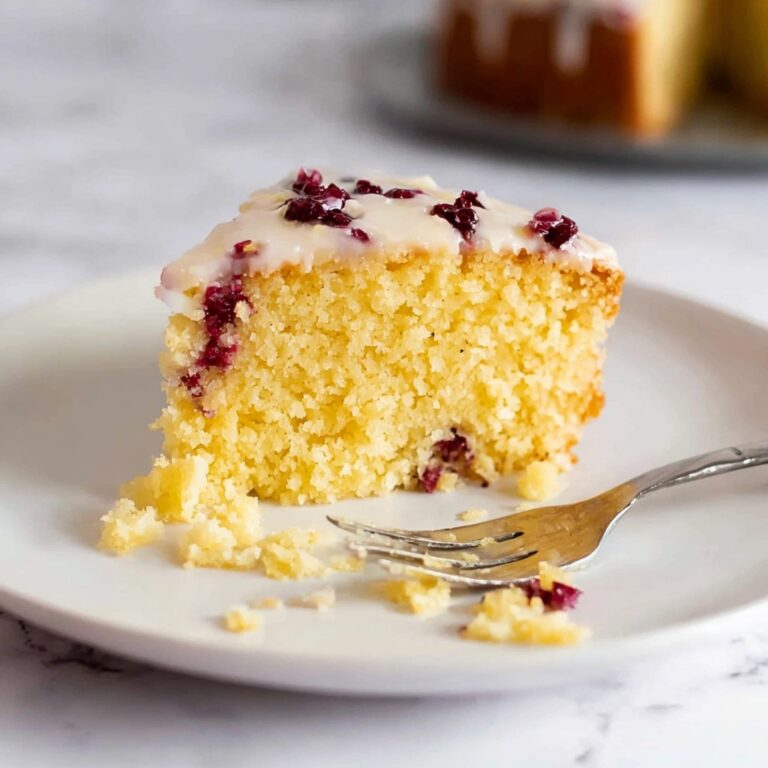
These creams pair wonderfully with a hot cup of coffee or a creamy cup of hot cocoa. The warmth of the drink brings out the mint and chocolate flavors beautifully, creating a cozy and indulgent experience. You can also serve them alongside fresh berries or a slice of pound cake for a sophisticated dessert plate.
Creative Ways to Present
Want to impress your guests? Arrange the creams in a decorative box lined with parchment paper or stack them in little clear jars adorned with ribbons. You can even skew them onto wooden sticks with a few mint leaves in between for a fun “minty pops” presentation that’s perfect for parties or gifts.
Make Ahead and Storage
Storing Leftovers
Your leftover Chocolate Mint Creams can be stored in an airtight container in the refrigerator for up to two weeks. Keeping them chilled ensures the chocolate stays firm and the mint cream filling retains its refreshing texture without softening too much.
Freezing
If you want to make these in advance or save extras for later, freeze the creams on a parchment-lined tray until solid, then transfer them to a freezer-safe container. They’ll keep well for up to a month. Just thaw them in the fridge before serving to enjoy that perfect texture again.
Reheating
These creams are best enjoyed cold or at room temperature. Avoid reheating as the chocolate coating can melt and cause the creams to lose their shape. If you find them too firm after refrigeration, simply leave them out for 10–15 minutes before serving to soften slightly.
FAQs
Can I use dark chocolate instead of semisweet chocolate chips?
Absolutely! Dark chocolate offers a deeper, richer flavor which pairs beautifully with the mint filling, but be mindful that it can be slightly more bitter, so adjust your confectioners’ sugar if you prefer a sweeter center.
Is there a substitute for shortening in the recipe?
You can use coconut oil or butter as a substitute for shortening, but keep in mind that these may slightly alter the texture and glossiness of the chocolate coating. Shortening tends to produce the smoothest finish.
How strong is the peppermint flavor?
With 2 teaspoons of peppermint extract, the flavor is pleasantly pronounced without being overpowering. You can adjust the amount to your preference—start with 1 teaspoon if you want a milder mint taste.
Can I make this recipe gluten-free?
Yes! This recipe is naturally gluten-free as it contains no flour or gluten-containing ingredients. Just double-check that your peppermint extract and any optional additions are gluten-free to be safe.
What’s the best way to prevent the chocolate from seizing while melting?
Melting chocolate in short 30-second intervals and stirring well after each is key. Also, ensure no water gets into the chocolate during melting, as even a small amount can cause it to seize.
Final Thoughts
There is something truly delightful about making and sharing your own Chocolate Mint Creams Recipe. From the silky, cool mint center to the beautifully smooth chocolate coating, every bite feels like a small celebration. Whether you’re gifting them, serving them at a gathering, or simply savoring a quiet moment, these creams bring joy and a touch of sweetness to any day. Give them a try—you just might find yourself coming back to this recipe again and again!
Print
Chocolate Mint Creams Recipe
- Prep Time: 20 minutes
- Cook Time: 10 minutes
- Total Time: 50 minutes
- Yield: 24 servings
- Category: Confectionery
- Method: No-Cook
- Cuisine: American
- Diet: Vegetarian
Description
These Chocolate Mint Creams are delightful homemade candies featuring a smooth peppermint-flavored cream center coated in rich semisweet chocolate. Perfect for mint and chocolate lovers, they combine refreshing peppermint extract with sweet confectioners’ sugar, creating a creamy filling that’s dipped in melted chocolate and chilled to perfection. This recipe yields about 24 pieces and is ideal for gifting or enjoying as a cool, refreshing treat.
Ingredients
Chocolate Coating
- 2 cups semisweet chocolate chips
- 2 tablespoons shortening
- 2 teaspoons peppermint extract
Peppermint Cream Center
- 2 cups confectioners’ sugar
- 2 tablespoons water
- Green food coloring (optional, a few drops)
Instructions
- Melt the Chocolate: In a microwave-safe bowl, melt the semisweet chocolate chips and shortening together by heating in 30-second intervals. Stir after each interval until the mixture is smooth and fully combined.
- Add Peppermint Extract: Stir in the peppermint extract thoroughly into the melted chocolate until evenly blended, creating a flavorful coating.
- Prepare the Cream Centers: In a separate bowl, combine the confectioners’ sugar, water, and a few drops of green food coloring if desired. Mix until smooth and uniform in color and texture.
- Shape the Creams: Take about 1 teaspoon of the peppermint cream mixture and roll it into small balls. Flatten each ball into a disc shape and place them on waxed paper. Refrigerate these discs until they are firm and set.
- Coat with Chocolate: Using a fork, carefully dip each peppermint cream disc into the melted chocolate mixture, letting any excess chocolate drip off. Place the coated creams back onto waxed paper for setting.
- Chill and Serve: Refrigerate the coated candies until the chocolate hardens completely. Once firm, store the Chocolate Mint Creams in an airtight container inside the refrigerator to maintain freshness.
Notes
- Use shortening to help the chocolate coating become smooth and glossy.
- Green food coloring is optional and just adds a festive touch to the cream centers.
- Ensure the cream centers are firm before dipping to prevent them from breaking apart.
- Store the candies refrigerated to keep them firm and fresh for up to two weeks.
- For a stronger mint flavor, adjust peppermint extract amount according to taste.


