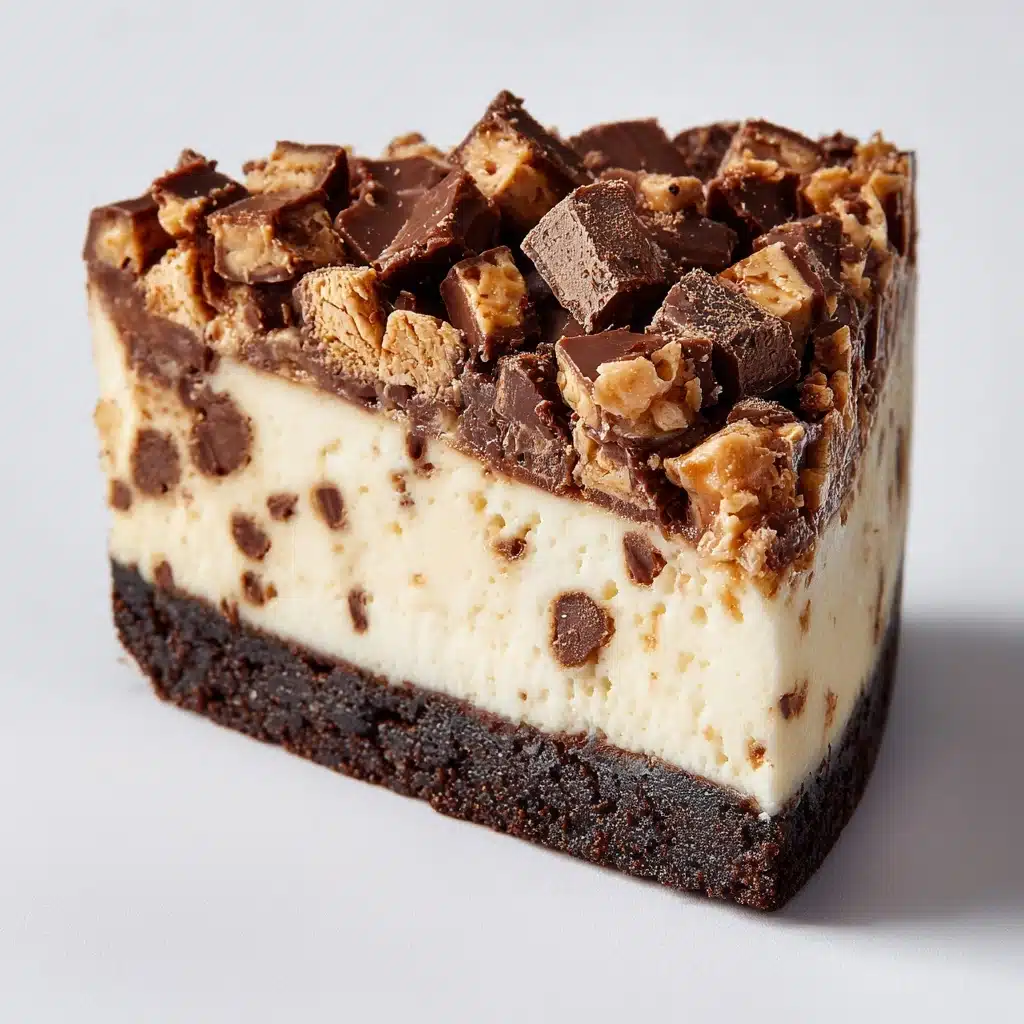
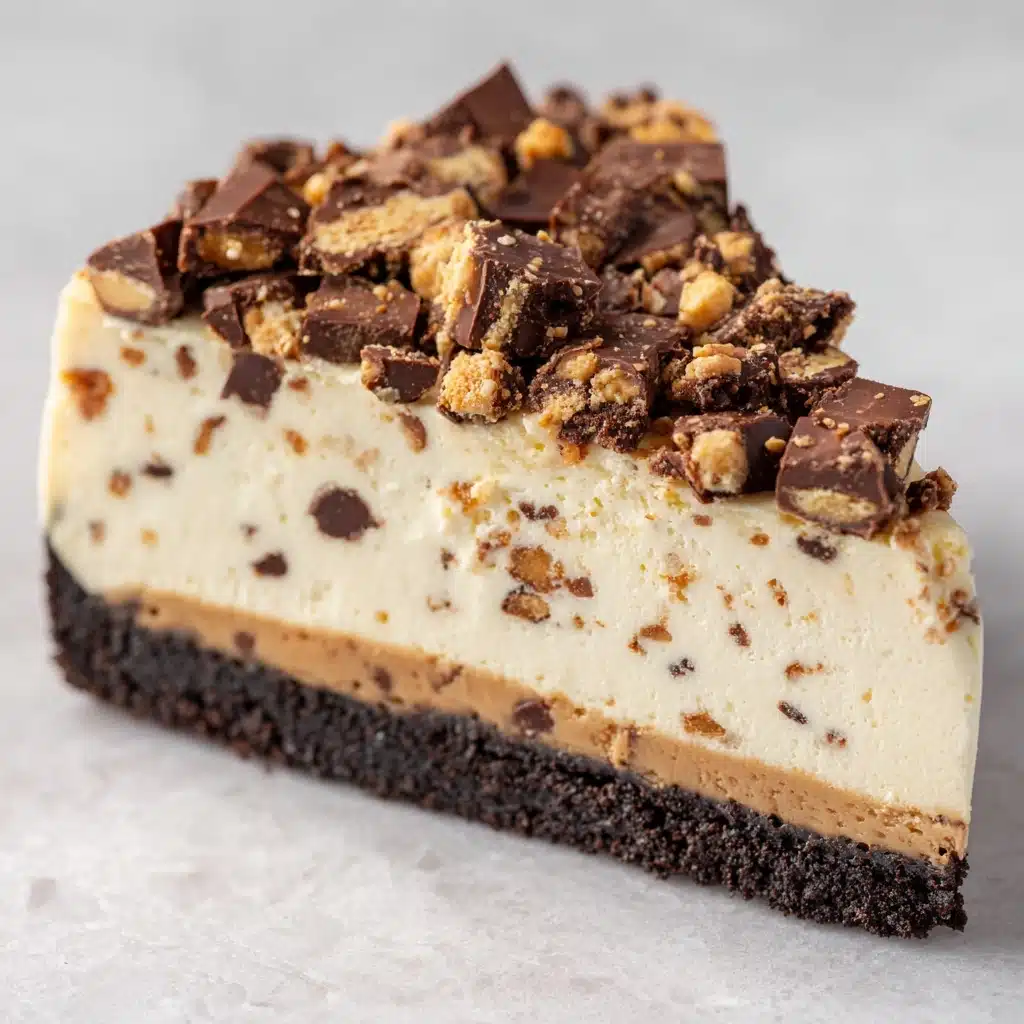
Butterfinger Pie (No-Bake) is pure joy in a pie plate. Imagine the creamy tang of cheesecake, the dreamy fluffiness of whipped topping, all swirled together with the irresistible crunch of Butterfinger crumbles and nestled in a chocolatey or graham cracker crust—without ever turning on the oven! This playful pie is a showstopper for parties, celebrations, or just because, and it comes together in no time, making it one of my favorite “let’s wow the crowd” desserts.
Ingredients You’ll Need
Ingredients You’ll Need
The magic of Butterfinger Pie (No-Bake) comes from its handful of wonderfully simple ingredients. Each one pulls its weight, bringing rich flavor, creamy texture, and those signature bursts of candy bar crunch that make every bite unforgettable.
- Cream Cheese (8 oz, softened): This forms the lush, tangy base that contrasts perfectly with all the sweetness and adds a cheesecake-like richness.
- Powdered Sugar (1/2 cup): Gives the filling sweetness and helps keep everything beautifully smooth.
- Whipped Topping (8 oz, like Cool Whip): Makes the filling light and airy, like a fluffy cloud inside your pie crust.
- Butterfinger Candy Bars (1 1/2 cups, about 4 regular bars, crushed): The star of the show! Crushed small, they deliver perfect buttery peanut butter and chocolate crunch in every forkful.
- Prepared Pie Crust (chocolate or graham cracker): Provides a sweet, crumbly foundation—choose your favorite for an extra flavor boost.
- Extra Crushed Butterfinger (for topping): Toss a final flourish over the pie for irresistible texture and a bakery-worthy finish.
How to Make Butterfinger Pie (No-Bake)
Step 1: Beat Cream Cheese and Sugar
Start by popping your softened cream cheese and powdered sugar into a large mixing bowl. Using a hand mixer or stand mixer, beat them together until silky smooth, with no lumps. Don’t rush this step—it’s worth the extra minute to make sure your base is dreamy and creamy.
Step 2: Gently Fold in Whipped Topping
Add the whipped topping to your bowl. Switch gears to a spatula or spoon, gently folding it in so the mixture stays light. This is where the magic starts to happen—the filling gets pillowy and fluffy, the kind of texture that will make you sneak a taste!
Step 3: Add Crushed Butterfinger Bars
Pour in most of the crushed Butterfinger candy bars (save a bit for the topping). Fold them into the filling so you get beautiful stripes and chunks of crispy, peanut buttery candy all throughout, but don’t overmix—you want those candy nuggets to stay a little crunchy!
Step 4: Assemble the Pie
Spoon the luscious filling into your prepared pie crust. Use a spatula to spread it out evenly and smooth the top. It’s already looking like dessert heaven, but wait—it gets better!
Step 5: Garnish with Extra Butterfinger
Sprinkle the reserved crushed Butterfinger pieces generously over the top. This not only jazzes up the presentation, but adds one more layer of crunch and color.
Step 6: Chill Until Firm
Cover the pie with plastic wrap or a lid, and transfer it to your refrigerator. Let it chill for at least 4 hours (or overnight, if you can wait!) so it sets up beautifully. This makes the Butterfinger Pie (No-Bake) slice easily and hold its shape.
How to Serve Butterfinger Pie (No-Bake)
Garnishes
Bring your Butterfinger Pie (No-Bake) to the next level with fun toppings. Besides those extra Butterfinger crumbles, you can drizzle over some melted peanut butter or chocolate for a showy finish, or add a swirl of whipped cream and maybe a cherry for that retro pie-shop touch. Don’t be shy about making it your own!
Side Dishes
This ultra-rich pie pairs beautifully with fresh fruit—try a handful of raspberries, sliced strawberries, or even some tangy orange segments alongside. If you prefer to go full-on indulgent, a scoop of vanilla or chocolate ice cream never hurts either!
Creative Ways to Present
Try spooning the filling into individual jars or glasses for cute, portable Butterfinger Pie (No-Bake) parfaits. Or cut the pie into bite-sized bars for easy party snacking. Want even more wow-factor? Serve slices with a dusting of cocoa powder or a cascade of mini peanut butter cups.
Make Ahead and Storage
Storing Leftovers
Leftover Butterfinger Pie (No-Bake) is a dream to store. Just cover the pie tightly with plastic wrap or aluminum foil, or transfer individual slices to airtight containers. Store in the fridge, where it will stay fresh for up to 3 days (if it lasts that long!)—the texture remains creamy and delicious, and the Butterfinger crunches mostly hold up.
Freezing
Butterfinger Pie (No-Bake) is freezer-friendly, which makes it a fantastic make-ahead dessert. Place it in a freezer-safe pie dish, cover well, and freeze for up to 2 months. For extra protection, you can add a layer of plastic wrap before topping with foil. Thaw overnight in the refrigerator before serving; the pie will retain its texture surprisingly well.
Reheating
There’s no need to reheat Butterfinger Pie (No-Bake)—in fact, it’s best served thoroughly chilled! If you’ve frozen the pie, simply allow it to thaw in the refrigerator for several hours or overnight, and it will be just as creamy and sliceable as the day you made it. Serve straight from the fridge for the best texture.
FAQs
Can I use homemade whipped cream instead of whipped topping?
Absolutely! Homemade whipped cream works perfectly in Butterfinger Pie (No-Bake). Just be sure to whip it until stiff peaks form so your filling stays firm and fluffy. You’ll need about 3 cups, whipped, to replace the topping in the recipe.
What’s the best way to crush Butterfinger bars?
Place the candy bars in a zip-top bag and whack them gently with a rolling pin or use your hands to break them up. Don’t pulverize them completely—you want some larger chunks mixed in for that signature crunchy texture throughout the pie.
Can I make Butterfinger Pie (No-Bake) ahead of time?
Yes! In fact, the pie tastes even better after chilling overnight as the flavors meld and the filling firms up. You can make it up to two days ahead; keep it well covered in the refrigerator until you’re ready to serve.
What if I can’t find Butterfinger bars?
If Butterfinger bars are unavailable, try using a similar crispy peanut butter candy or peanut butter cups with toffee bits. The flavor and crunch may vary slightly, but your pie will still be a crowd-pleaser.
Can I use a homemade pie crust?
Definitely! Both homemade graham cracker and chocolate cookie crusts are excellent choices for Butterfinger Pie (No-Bake). They really add a personal, from-scratch touch and can bump up the overall flavor.
Final Thoughts
If you’re looking for an easy, crowd-pleasing dessert that’s brimming with nostalgic candy bar flair, Butterfinger Pie (No-Bake) is a must-try. Every creamy, peanut buttery forkful is pure fun, and it’s so simple you’ll find yourself making it again and again. Give it a spin—you just might discover your new go-to favorite pie!
PrintButterfinger Pie (No-Bake) Recipe
Indulge in this decadent Butterfinger Pie that requires no baking! A dreamy, creamy filling loaded with crushed Butterfinger candy bars nestled in a chocolate or graham cracker crust, topped with more candy bar pieces. Perfect for any occasion!
- Prep Time: 10 minutes
- Cook Time: 0 minutes
- Total Time: 4 hours 10 minutes
- Yield: 8 slices
- Category: Dessert
- Method: No-Bake
- Cuisine: American
- Diet: Non-Vegetarian
Ingredients
Creamy Filling:
1 (8 oz) package cream cheese (softened), 1/2 cup powdered sugar, 1 (8 oz) tub whipped topping (like Cool Whip), 1 1/2 cups crushed Butterfinger candy bars (about 4 regular bars)
Crust and Topping:
1 prepared chocolate or graham cracker pie crust, extra crushed Butterfinger for topping
Instructions
- Prepare the Creamy Filling: In a large bowl, beat the softened cream cheese and powdered sugar until smooth. Gently fold in the whipped topping. Stir in the crushed Butterfinger bars, reserving some for garnish.
- Assemble the Pie: Spoon the mixture into the pie crust, spread evenly. Sprinkle reserved Butterfinger pieces on top.
- Chill and Serve: Cover and refrigerate for at least 4 hours until firm. Slice and serve chilled.
Notes
- For extra flavor, drizzle melted peanut butter or chocolate over the top before serving.
- Pie can be made up to 2 days ahead for convenience.
Nutrition
- Serving Size: 1 slice
- Calories: 390
- Sugar: 28g
- Sodium: 260mg
- Fat: 25g
- Saturated Fat: 13g
- Unsaturated Fat: 10g
- Trans Fat: 0g
- Carbohydrates: 35g
- Fiber: 1g
- Protein: 5g
- Cholesterol: 35mg


