
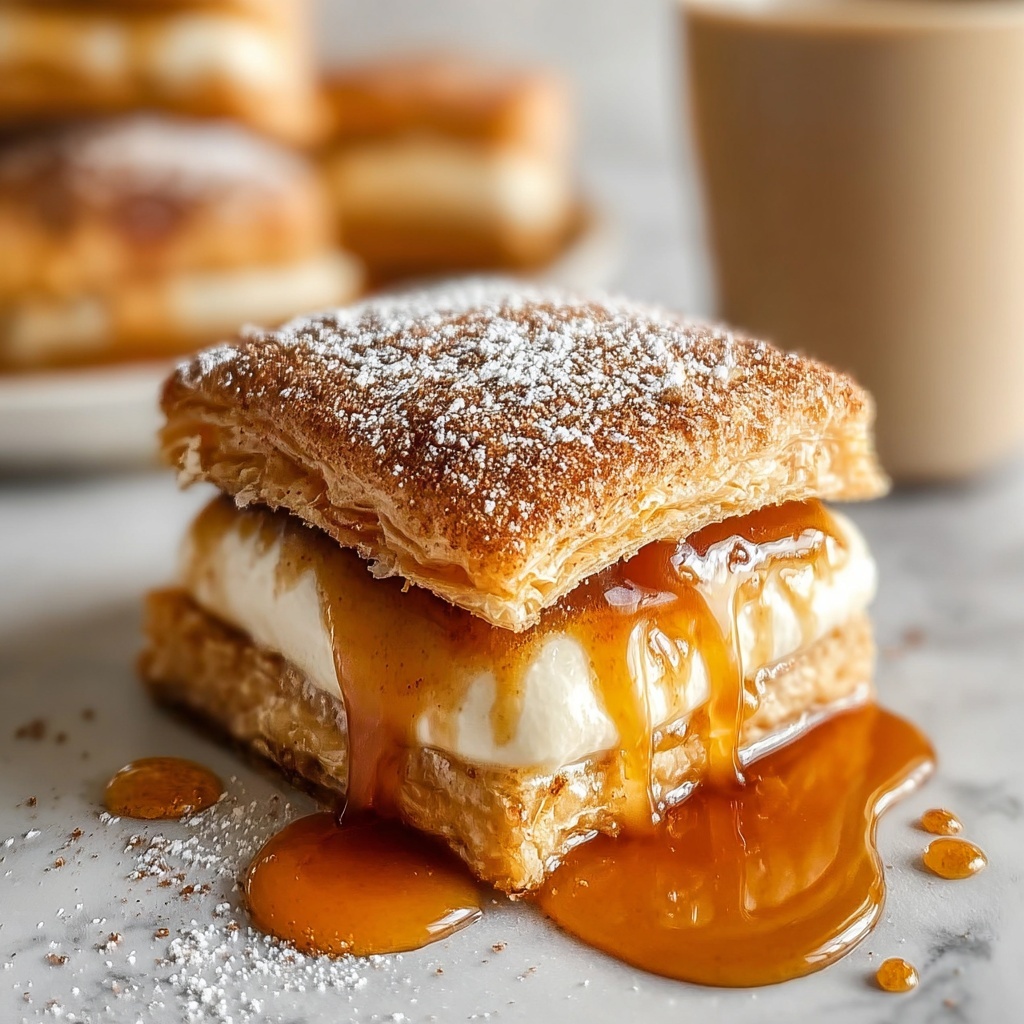
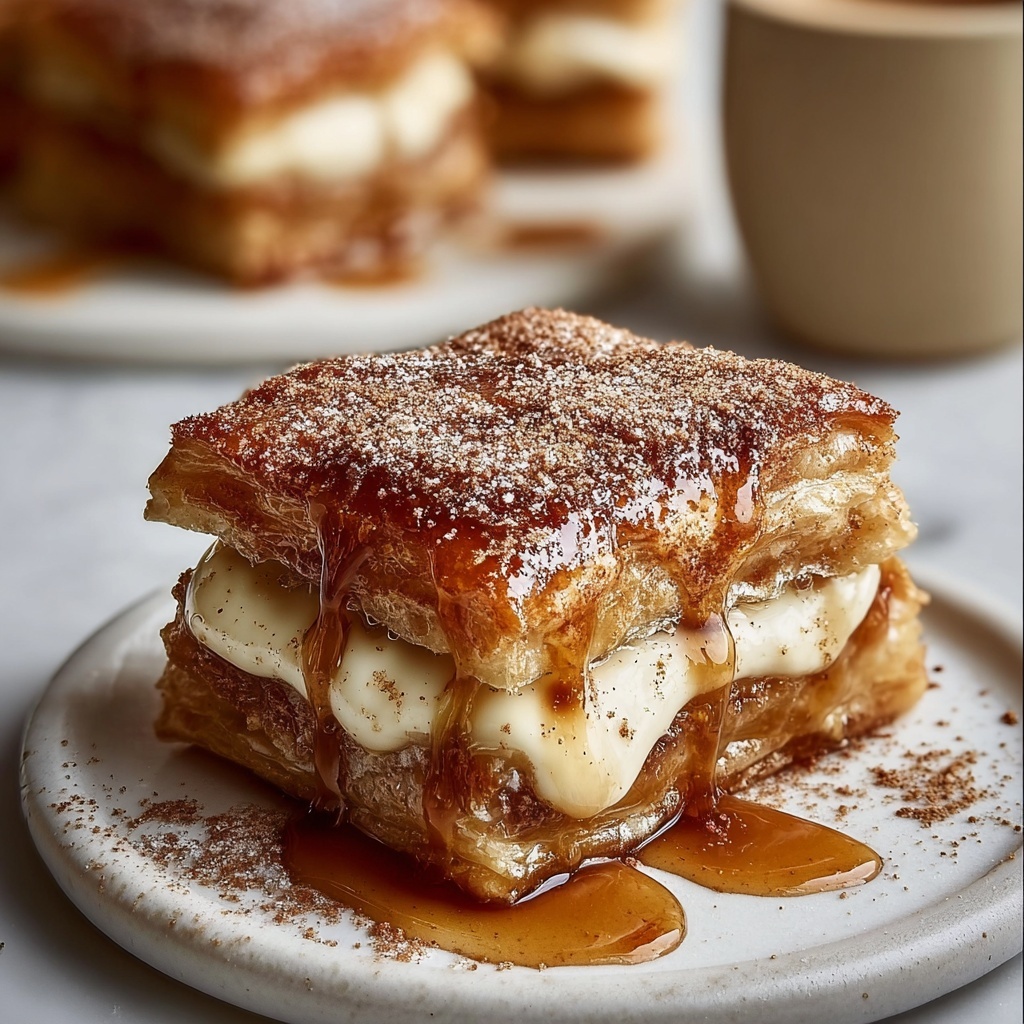
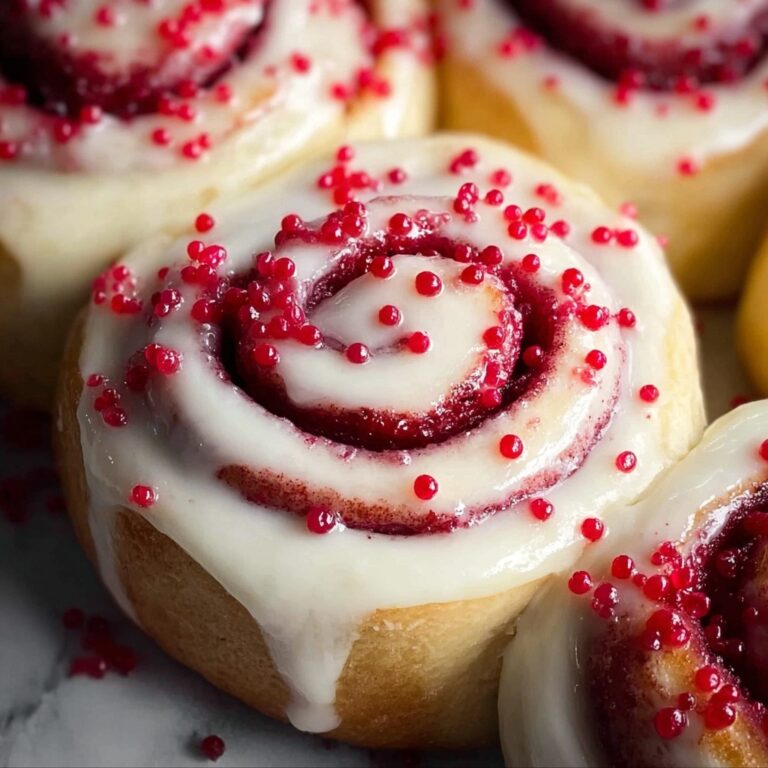
If you have a serious sweet tooth and love the nostalgic charm of pop tarts, wait until you try these Brown Sugar Pop Tart Cookies: The Ultimate Guide Recipe. Imagine the perfect balance of buttery cookie dough wrapped around a luscious brown sugar filling, all topped with a delicate vanilla glaze and a sprinkle of joy. These homemade treats bring comfort and excitement in every bite, making your kitchen smell like heaven and your taste buds dance with delight. Whether you’re baking for a cozy afternoon or a festive gathering, this recipe is a true game-changer that elevates classic flavors into an irresistible cookie experience.
Ingredients You’ll Need
Getting ready to create magic in the kitchen is easier than you think because this recipe relies on simple, pantry-friendly ingredients that come together to create incredible flavors and textures. Each ingredient plays a vital role in ensuring your Brown Sugar Pop Tart Cookies turn out soft, flavorful, and perfectly sweet.
- All-purpose flour: The backbone of your cookie dough that provides structure and tenderness.
- Baking powder and baking soda: Essential for giving your cookies a light, slightly puffy texture.
- Salt: Balances sweetness and enhances flavor throughout the cookie layers.
- Unsalted butter: Adds rich, creamy notes and moisture for that melt-in-your-mouth feel.
- Granulated sugar and light brown sugar: The perfect combo for sweetness with a touch of caramel depth from the brown sugar.
- Eggs: Bind everything together and contribute to the dough’s softness.
- Vanilla extract: Brings warmth and rounds out the flavors beautifully.
- Milk: Used in both the filling and glaze to adjust consistency and create smooth textures.
- Ground cinnamon: Adds a subtle spice that complements the brown sugar filling wonderfully.
- Powdered sugar: The key to a silky, sweet glaze that finishes the cookies with a little sparkle.
- Sprinkles: Totally optional, but an instant way to bring a smile and colorful flair to your cookies.
How to Make Brown Sugar Pop Tart Cookies: The Ultimate Guide Recipe
Step 1: Combine Dry Ingredients
Start by whisking together the all-purpose flour, baking powder, baking soda, and salt in a medium bowl. This dry mix sets the stage for the cookie dough’s perfect texture and even rise. Setting it aside keeps things organized and helps with a smooth mixing process later on.
Step 2: Cream Butter and Sugars
In a large mixing bowl, cream the softened butter with granulated sugar and light brown sugar. Beat them together until the mixture is light, fluffy, and almost cloud-like—this takes about 3 to 5 minutes. This step is where the magic begins; it traps air inside for a tender crumb in your cookies.
Step 3: Add Eggs and Vanilla
Beat in the eggs one at a time, making sure each is fully incorporated before adding the next. Then stir in the vanilla extract to infuse that cozy, sweet aroma. This combination deepens the flavor and makes sure your dough binds beautifully.
Step 4: Gradually Add Dry Ingredients
Slowly mix in your dry ingredient blend on low speed just until you see the flour disappear. This careful folding keeps your dough soft and prevents it from becoming tough or overworked.
Step 5: Chill the Dough
Divide the dough into two halves, flatten each into discs, and wrap them tightly in plastic. Chill for at least an hour or two—this step is crucial for easier rolling and helps the flavors develop fully.
Step 6: Combine Filling Ingredients
In a separate bowl, mix softened butter, brown sugar, flour, milk, cinnamon, and salt until you have a smooth, creamy filling. If the filling feels too thick, add milk a teaspoon at a time; if too thin, add a touch of flour until you get just the right spreadability.
Step 7: Preheat Oven and Prepare Baking Sheets
Set your oven to 350°F (175°C) and line two baking sheets with parchment paper. Having this ready means your kitchen is primed for a smooth bake without delays.
Step 8: Roll Out the Dough
On a floured surface, roll out one disc of dough to ⅛-inch thickness and cut out shapes with a 3-inch cutter. Place these on the baking sheets with space between to allow for baking expansion.
Step 9: Repeat with Second Dough Disc
Roll and cut the second disc of dough for the tops of the cookies. Keeping them uniform ensures your pop tart cookies stack nicely and look professional.
Step 10: Apply Filling
Spread a thin layer of that delicious brown sugar filling onto half of the bottom cookies, leaving a small edge free of filling. This little border helps seal the cookies together without the filling spilling out.
Step 11: Top with Second Cookie
Gently place the remaining cookies on top of each filled one, aligning the edges closely for a neat finish.
Step 12: Seal the Edges
Use a fork to crimp the cookie edges together, which creates a charming look and seals in the filling perfectly to avoid spills during baking.
Step 13: Poke Holes
Use a toothpick or skewer to create small holes in the top cookies. This step is crucial for steam to escape, preventing your cookies from puffing up too much in the oven.
Step 14: Bake
Bake for 10 to 12 minutes, until edges turn a light golden brown. Keep an eye on them; you want a tender cookie with just a hint of crunch around the edges.
Step 15: Cool
Allow the cookies to cool on the baking sheets for a few minutes before transferring them to a wire rack. This prevents them from breaking and lets them set perfectly for glazing.
Step 16: Prepare the Glaze
Whisk powdered sugar, milk, and vanilla extract until smooth in a medium bowl. Adjust with a little more milk for the glaze consistency that you prefer—thin enough to drizzle but thick enough to hold shape.
Step 17: Glaze the Cookies
Once the cookies are completely cool, drizzle the glaze generously over the top of each one. This step turns them from lovely homemade treats into utterly irresistible desserts.
Step 18: Add Sprinkles (Optional)
Sprinkle your favorite colorful sprinkles immediately after drizzling while the glaze is wet. It adds a fun, festive touch and a bit of whimsy to the presentation.
Step 19: Let the Glaze Set
Give the glaze at least 30 minutes to an hour to firm up before serving or storing. This ensures a beautiful finish that won’t stick or smudge.
How to Serve Brown Sugar Pop Tart Cookies: The Ultimate Guide Recipe
Garnishes
Adding a sprinkle of coarse sugar or a dusting of cinnamon on top of the glaze before it sets can bring an extra sparkle and subtle crunch that pairs beautifully with the soft cookie texture. Fresh mint leaves also add a pop of color and a refreshing contrast.
Side Dishes
These cookies shine on their own but serve wonderfully with a warm cup of chai tea, rich hot chocolate, or a creamy latte for a cozy treat. Pairing them with vanilla ice cream is another dreamy option that feels decadent and satisfying.
Creative Ways to Present
For parties or gifting, wrap a stack of these Brown Sugar Pop Tart Cookies in parchment paper tied with twine or a festive ribbon. Arrange them in decorative tins or clear jars with colorful ribbons to share your baking love in style.
Make Ahead and Storage
Storing Leftovers
Store your Brown Sugar Pop Tart Cookies in an airtight container at room temperature for up to 4 days. This keeps them soft and fresh while preserving that sweet brown sugar filling flavor.
Freezing
If you want to save some for later, freeze the baked and glazed cookies by placing them in a single layer on a baking sheet first, then transferring them to a freezer-safe container. They keep well in the freezer for up to 3 months and thaw quickly at room temperature.
Reheating
To warm the cookies and bring back that fresh-baked feel, pop them in a preheated oven at 300°F (150°C) for 5 to 7 minutes. Avoid microwaving as it might make the cookies softer but less tender on the edges.
FAQs
Can I use brown sugar instead of granulated sugar in the dough?
Brown sugar adds more moisture and a richer flavor, so while you can substitute it fully, the texture might be a bit chewier. This recipe balances both sugars perfectly for the ideal crumb.
What can I do if my filling is too runny?
If your brown sugar filling is too thin, gradually add a bit more flour to thicken it up. This makes spreading easier and prevents the filling from leaking out during baking.
Can I make these cookies gluten-free?
You can substitute all-purpose flour with a gluten-free flour blend, but results may vary slightly in texture. Make sure the blend contains xanthan gum or a similar binder for the best structure.
How long will the glaze take to set?
The glaze usually takes between 30 minutes to an hour to fully dry and set, depending on humidity and temperature. It should be firm to the touch before you store or serve.
Is it necessary to chill the dough?
Chilling the dough is highly recommended because it firms up the butter, making the rolling and cutting much easier. It also helps prevent spreading during baking for nicer-shaped cookies.
Final Thoughts
Honestly, there’s nothing quite like biting into a homemade Brown Sugar Pop Tart Cookies: The Ultimate Guide Recipe treat. The combination of buttery, soft cookie layers enveloping that sweet brown sugar filling, all finished with a glistening vanilla glaze, is pure joy on a plate. Whether you are an avid baker or just looking for a special dessert to wow friends and family, this recipe is a must-try. So grab your apron, get mixing, and prepare to fall in love with your new favorite cookie!
Print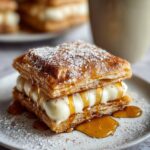
Brown Sugar Pop Tart Cookies: The Ultimate Guide Recipe
- Prep Time: 25 minutes
- Cook Time: 12 minutes
- Total Time: 1 hour 57 minutes
- Yield: 24 cookies
- Category: Dessert, Snack
- Method: Baking
- Cuisine: American
Description
Brown Sugar Pop Tart Cookies are a delightful twist on the classic pop tart, featuring a tender cookie crust filled with a sweet brown sugar cinnamon filling and topped with a smooth vanilla glaze and festive sprinkles. Perfect for an indulgent treat or a fun baking project that yields 24 delicious cookies.
Ingredients
Cookie Dough
- 2 ½ cups all-purpose flour, plus more for dusting
- 1 teaspoon baking powder
- ½ teaspoon baking soda
- ½ teaspoon salt
- 1 cup (2 sticks) unsalted butter, softened
- ¾ cup granulated sugar
- ¾ cup packed light brown sugar
- 2 large eggs
- 1 teaspoon vanilla extract
Brown Sugar Filling
- ½ cup (1 stick) unsalted butter, softened
- 1 cup packed light brown sugar
- 2 tablespoons all-purpose flour
- 1 tablespoon milk
- ½ teaspoon ground cinnamon
- ¼ teaspoon salt
Vanilla Glaze
- 2 cups powdered sugar
- 4–6 tablespoons milk, or more as needed
- ½ teaspoon vanilla extract
- Your favorite sprinkles for decorating
Instructions
- Combine Dry Ingredients: In a medium bowl, whisk together the flour, baking powder, baking soda, and salt. Set aside for later use.
- Cream Butter and Sugars: In a large bowl or stand mixer, cream the softened butter with the granulated sugar and brown sugar until the mixture is light and fluffy, about 3-5 minutes.
- Add Eggs and Vanilla: Beat in the eggs one at a time, ensuring each is well incorporated before adding the next, then stir in the vanilla extract.
- Gradually Add Dry Ingredients: Add the dry ingredient mixture slowly to the wet ingredients on low speed, mixing only until just combined to avoid overworking the dough.
- Chill the Dough: Divide the dough into two equal halves, flatten each into a disc, wrap tightly in plastic wrap, and refrigerate for at least 1 to 2 hours to firm up.
- Combine Filling Ingredients: In a medium bowl, mix together the softened butter, brown sugar, flour, milk, cinnamon, and salt until smooth and creamy to make the filling.
- Adjust Consistency (if needed): If the filling feels too thick, add milk a teaspoon at a time; if too thin, add flour in small increments until the right spreadable consistency is achieved.
- Preheat Oven and Prepare Baking Sheets: Set the oven to 350°F (175°C) and line two baking sheets with parchment paper.
- Roll Out the Dough: On a floured surface, roll out one dough disc to about ⅛ inch thick. Using a 3-inch cookie cutter (round or rectangular), cut out shapes and place them evenly spaced on the baking sheets.
- Repeat with Second Dough Disc: Roll out the remaining dough and cut out an equal number of cookies to serve as tops.
- Apply Filling: Spread a thin layer of the brown sugar filling on half of the cookies, leaving a small border around the edges to prevent overflow.
- Top with Second Cookie: Carefully place the second cookie on top of each filled cookie, aligning edges precisely.
- Seal the Edges: Use a fork to crimp the edges of the cookies to enclose the filling securely.
- Poke Holes (Important!): Use a toothpick or skewer to poke several small holes on the top of each cookie to allow steam to escape during baking.
- Bake: Bake in the preheated oven for 10-12 minutes, or until the edges turn a light golden brown.
- Cool: Let the cookies cool for a few minutes on the baking sheets before transferring them to wire racks to cool completely.
- Prepare the Glaze: Whisk together powdered sugar, milk, and vanilla extract in a bowl until smooth, adjusting milk quantity until desired glaze consistency is reached.
- Glaze the Cookies: Once cookies are fully cool, drizzle the glaze generously over each cookie.
- Add Sprinkles (Optional): Immediately decorate with your favorite sprinkles before the glaze sets for added color and fun.
- Let the Glaze Set: Allow the glaze to set for 30 minutes to an hour before serving or storing to ensure it hardens properly.
Notes
- Make sure to chill the dough thoroughly; this helps the cookies hold their shape during baking.
- If you don’t have a 3-inch cookie cutter, use any small round or rectangular cutter you have on hand.
- Adjust the thickness of the filling to prevent it from leaking out during baking.
- Using parchment paper on baking sheets helps prevent sticking and messy cleanup.
- To store, keep cookies in an airtight container at room temperature for up to 3 days.
- For a dairy-free variation, substitute butter with a vegan butter alternative and milk with almond or oat milk.


