If you’ve ever craved a warm, comforting treat that feels like a gentle hug from the inside, then you’re in for a real delight with the Buttery Bubble Bread: 7 Steps to Comforting Bliss Recipe. This irresistible bread is a soft, buttery, pull-apart masterpiece that transforms simple ingredients into a cozy, melt-in-your-mouth experience. Whether you’re new to bread-making or a seasoned baker, this recipe guides you through an easy, step-by-step process that results in a golden, pillowy loaf perfect for any occasion. Trust me, once you try this, it will become your go-to comfort bread, ideal for sharing around the table or just savoring on your own.
Ingredients You’ll Need
The magic of this Buttery Bubble Bread: 7 Steps to Comforting Bliss Recipe lies not only in its method but also in its straightforward, accessible ingredients. Each one plays a key role, ensuring you get that perfect balance of flavor, fluffiness, and golden color.
- 4 cups all-purpose flour: The backbone of your bread, offering structure and the perfect chewy texture.
- 1 packet active dry yeast: This little packet is your secret to achieving that beautifully risen loaf full of soft bubbles.
- 1/4 cup sugar: Adds a touch of sweetness to balance the buttery richness and helps activate the yeast.
- 1 teaspoon salt: Enhances all the flavors and keeps your dough from tasting flat.
- 1 cup warm milk: Provides moisture and a tender crumb as well as activating the yeast with just the right warmth.
- 1/2 cup unsalted butter, melted: Infuses the bread with a luxurious, buttery flavor and helps keep it soft.
- 2 large eggs: Bind everything together and enrich the dough with extra tenderness and color.
How to Make Buttery Bubble Bread: 7 Steps to Comforting Bliss Recipe
Step 1: Activate Your Yeast
Start by combining warm milk and sugar in a bowl, then stir in the active dry yeast and let it sit uncovered for about 5 minutes. You’ll know it’s ready when it starts to get frothy — that bubbling action tells you the yeast is waking up and ready to work its magic.
Step 2: Mix the Dough
Next, add the melted butter, eggs, salt, and all your flour to the frothy yeast mixture. Stir everything gently until it starts to form a cohesive dough. This is where all your simple ingredients come together to form the base of the buttery bubble bread.
Step 3: Knead to Perfection
Turn your dough out onto a floured surface and knead for about 5 minutes. You’re aiming for a smooth, elastic texture — this builds the gluten that gives the bread its springy, airy quality. Don’t be afraid to get your hands a little messy; it’s part of the fun!
Step 4: First Rise
Place your dough into a greased bowl, cover it with a clean kitchen towel or plastic wrap, and let it rise somewhere warm for about an hour. During this time, the dough will double in size as the yeast ferments, creating those signature bubbles.
Step 5: Divide the Dough
Now comes the satisfying part: punch down the risen dough to release excess air, then divide it into small, even balls. These little morsels of dough will form the “bubbles” of your bread when arranged in the baking pan.
Step 6: Arrange in Pan
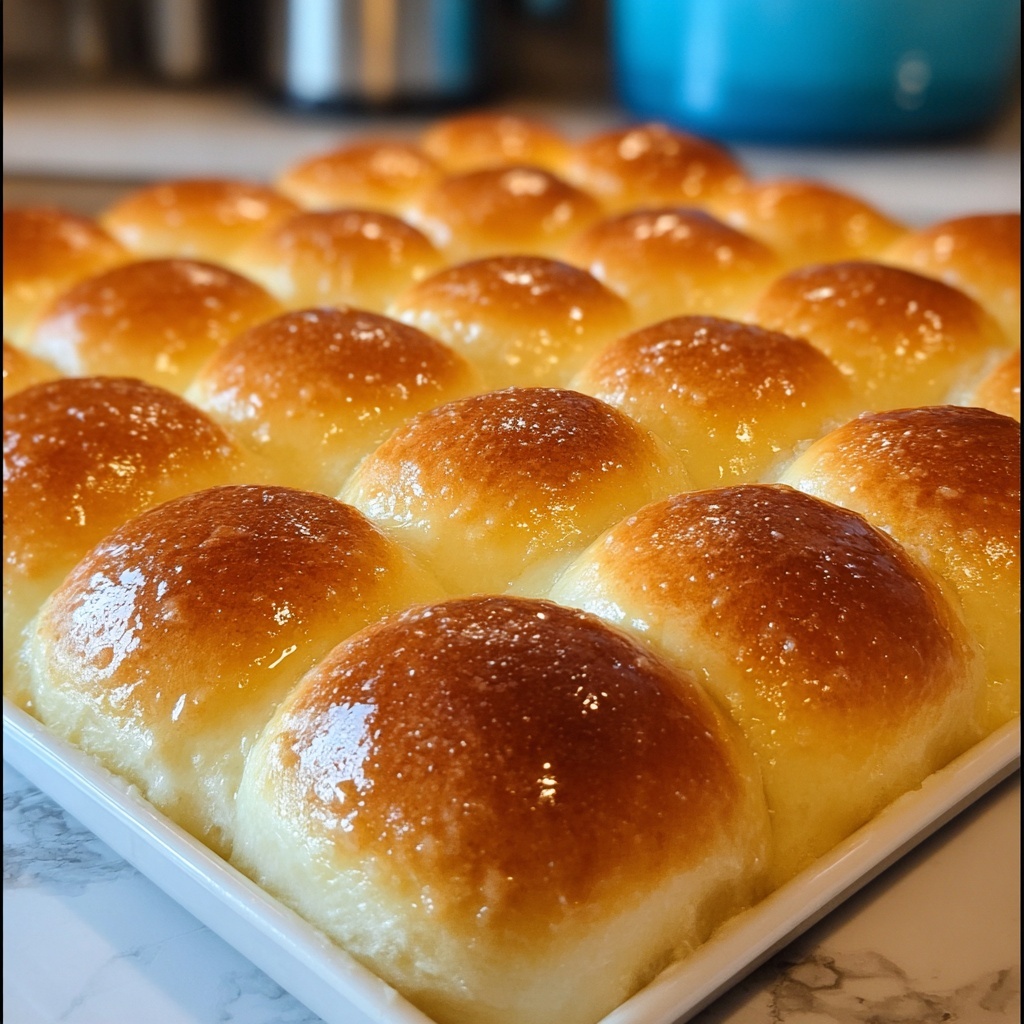
Lightly grease your baking pan and arrange the dough balls snugly inside. The closeness is key because as they rise again, they’ll puff up and fuse together to create that irresistibly pull-apart texture.
Step 7: Final Rise and Bake
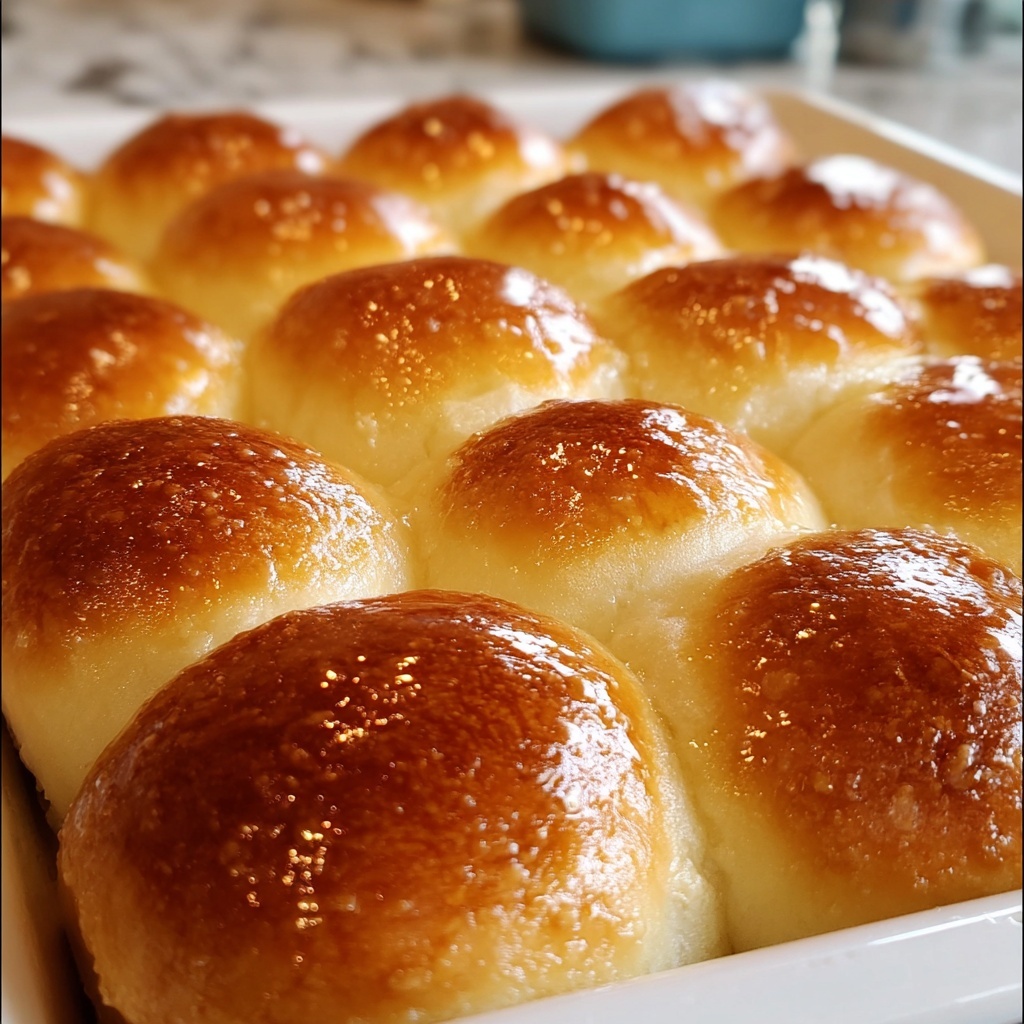
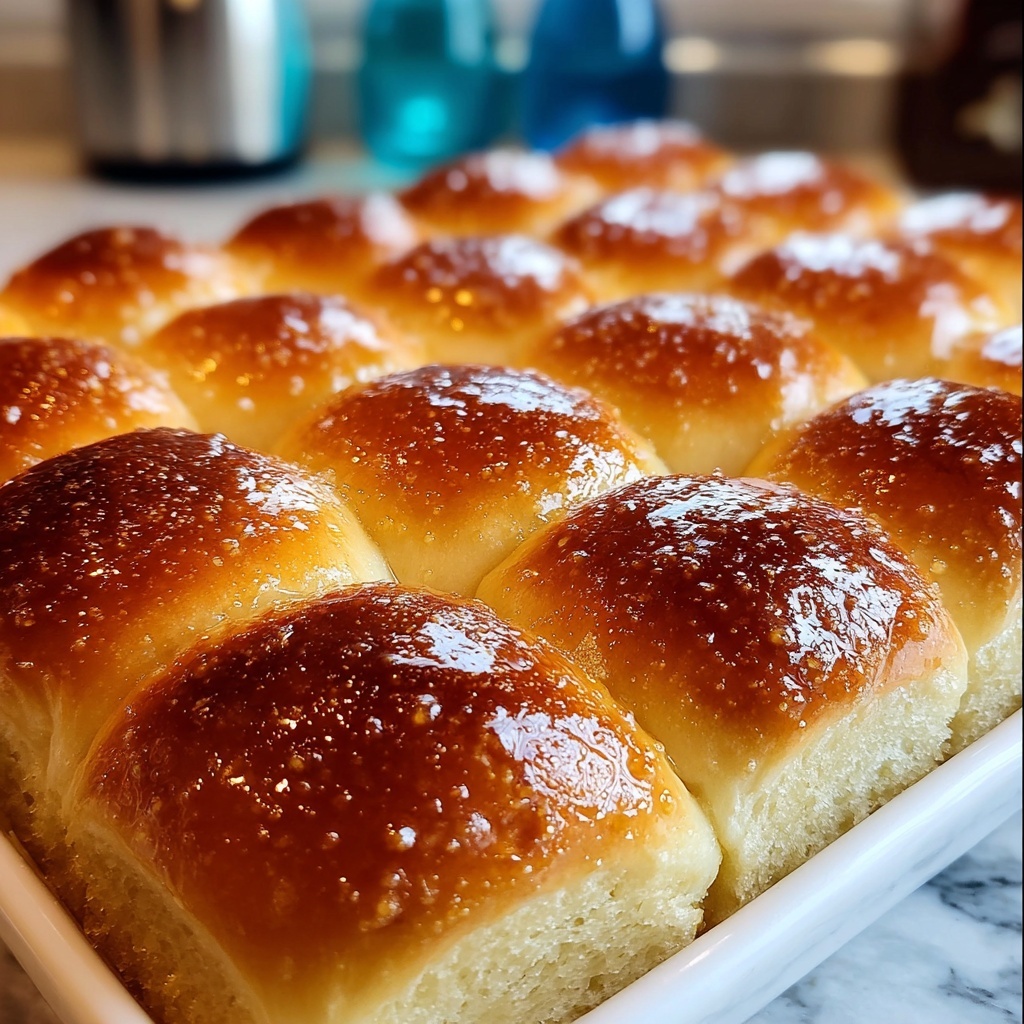
Cover the pan and let the dough balls rise for another 30 minutes, allowing them to become puffy and nearly double in size. Then pop them into your preheated oven at 350°F and bake for 25 to 30 minutes until golden brown and heavenly smelling. Right after the oven, brush the entire loaf with melted butter for that extra buttery finish that makes this bread truly comforting.
How to Serve Buttery Bubble Bread: 7 Steps to Comforting Bliss Recipe
Garnishes
While the bread is perfect on its own, you can elevate it with a few garnishes. A sprinkle of flaky sea salt, a dusting of freshly chopped herbs like rosemary or thyme, or even a light brush of honey mixed with melted butter right after baking adds layers of flavor and makes it look even more inviting.
Side Dishes
This butter bubble bread pairs wonderfully with almost anything! Think steamy bowls of soup, rich stews, or even as a base for a delicious sandwich. It’s especially perfect alongside creamy mashed potatoes or hearty chili to soak up all the cozy flavors.
Creative Ways to Present
Try serving your Buttery Bubble Bread: 7 Steps to Comforting Bliss Recipe in a cast iron skillet or a rustic wooden tray for a charming touch. You can even spread softened butter between the bubbles right before baking for extra layers of indulgence. Or slice it up and serve with dips like spinach artichoke or warm garlic cheese spread for a crowd-pleasing appetizer.
Make Ahead and Storage
Storing Leftovers
Keep any leftover bubble bread in an airtight container or wrapped tightly in plastic wrap at room temperature. It will stay soft and fresh for up to two days, perfect for quick snacks or sandwiches.
Freezing
This bread freezes beautifully! After baking and cooling completely, slice or keep whole, wrap it tightly in plastic wrap and place in a freezer-safe bag. It will keep for up to three months, ready to thaw whenever you’re craving a little comforting bliss.
Reheating
To refresh your leftover butter bubble bread, wrap it in foil and warm it in a preheated oven at 300°F for about 10-15 minutes. This method brings back the soft, buttery texture with a just-baked warmth that’s simply irresistible.
FAQs
Can I use bread flour instead of all-purpose flour?
Absolutely! Bread flour will give your bubble bread a chewier texture due to its higher protein content, but all-purpose flour works perfectly to keep it tender and soft, which is exactly what you want for this recipe.
What if I don’t have warm milk?
If you don’t have warm milk handy, you can warm it gently on the stove or in the microwave until it’s comfortably warm to the touch (about 100°F). This warmth is essential for activating the yeast properly.
Can I make this bread dairy-free?
Yes, simply substitute the milk with a dairy-free alternative like almond or oat milk, and use a plant-based butter substitute for brushing. The bread will still be deliciously buttery and tender!
Is the bread good the next day?
Definitely! The bread remains soft and flavorful for a day or two when stored correctly, and reheating it will make it taste almost as fresh as straight from the oven.
How important is the second rise?
The second rise is crucial — it allows the dough balls to puff up and stick together, forming the signature pull-apart texture that makes this bread so much fun to eat. Don’t skip it!
Final Thoughts
This Buttery Bubble Bread: 7 Steps to Comforting Bliss Recipe is more than just bread — it’s a comforting, joyful experience that fills your kitchen with warmth and invites you to slow down and savor simple pleasures. With such straightforward steps and ingredients, it’s a perfect recipe to share with loved ones or to enjoy as a special homemade treat. Give it a try and let the buttery, pillowy bubbles bring a little extra bliss to your day!
Print
Buttery Bubble Bread: 7 Steps to Comforting Bliss Recipe
- Prep Time: 20 minutes
- Cook Time: 30 minutes
- Total Time: 1 hour 50 minutes
- Yield: 12 servings
- Category: Bread
- Method: Baking
- Cuisine: American
Description
Buttery Bubble Bread is a soft, comforting homemade bread made from individual dough balls baked together to form a pull-apart loaf. This recipe combines the warmth of yeast dough with rich butter, resulting in a fluffy and flavorful bread perfect for sharing.
Ingredients
Dry Ingredients
- 4 cups all-purpose flour
- 1 packet active dry yeast (about 2 1/4 teaspoons)
- 1/4 cup sugar
- 1 teaspoon salt
Wet Ingredients
- 1 cup warm milk (110°F/43°C)
- 1/2 cup unsalted butter, melted, plus extra for brushing
- 2 large eggs
Instructions
- Activate Yeast: In a bowl, combine the warm milk and sugar. Stir in the active dry yeast and let it sit for 5 minutes until it becomes frothy, indicating the yeast is active.
- Mix Dough Ingredients: Add the melted butter, eggs, salt, and flour to the yeast mixture. Mix until a cohesive dough forms.
- Knead the Dough: Turn the dough onto a floured surface and knead for about 5 minutes until smooth and elastic.
- First Rise: Place the dough in a greased bowl, cover it with a clean towel or plastic wrap, and let it rise in a warm spot for 1 hour or until doubled in size.
- Form Dough Balls: Punch down the risen dough and divide it into small equal-sized balls.
- Arrange in Pan: Grease a baking pan and arrange the dough balls close together but not squished.
- Second Rise: Cover the pan and let the dough balls rise for another 30 minutes until puffy.
- Bake the Bread: Preheat the oven to 350°F (175°C). Bake the bread for 25-30 minutes until golden brown and cooked through.
- Finish with Butter: Remove the bread from the oven and immediately brush the top with melted butter for a rich, shiny finish before serving.
Notes
- Ensure your milk is warm but not hot to avoid killing the yeast.
- You can substitute whole milk with a plant-based milk for a dairy-free version but the texture may vary.
- Letting the bread cool slightly before pulling apart helps keep the shape intact.
- Store leftovers in an airtight container or freeze for longer keeping.
- Add garlic powder or herbs to the dough for a savory twist.


