
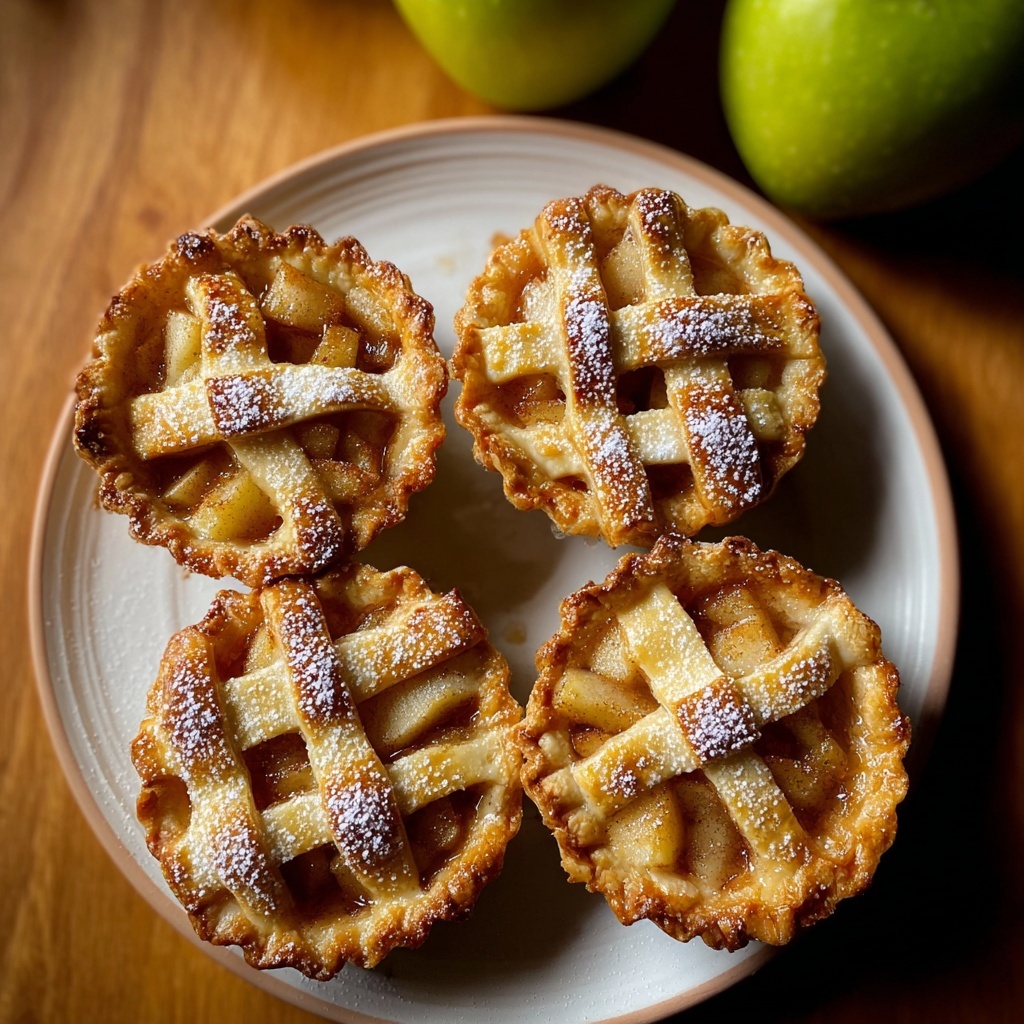
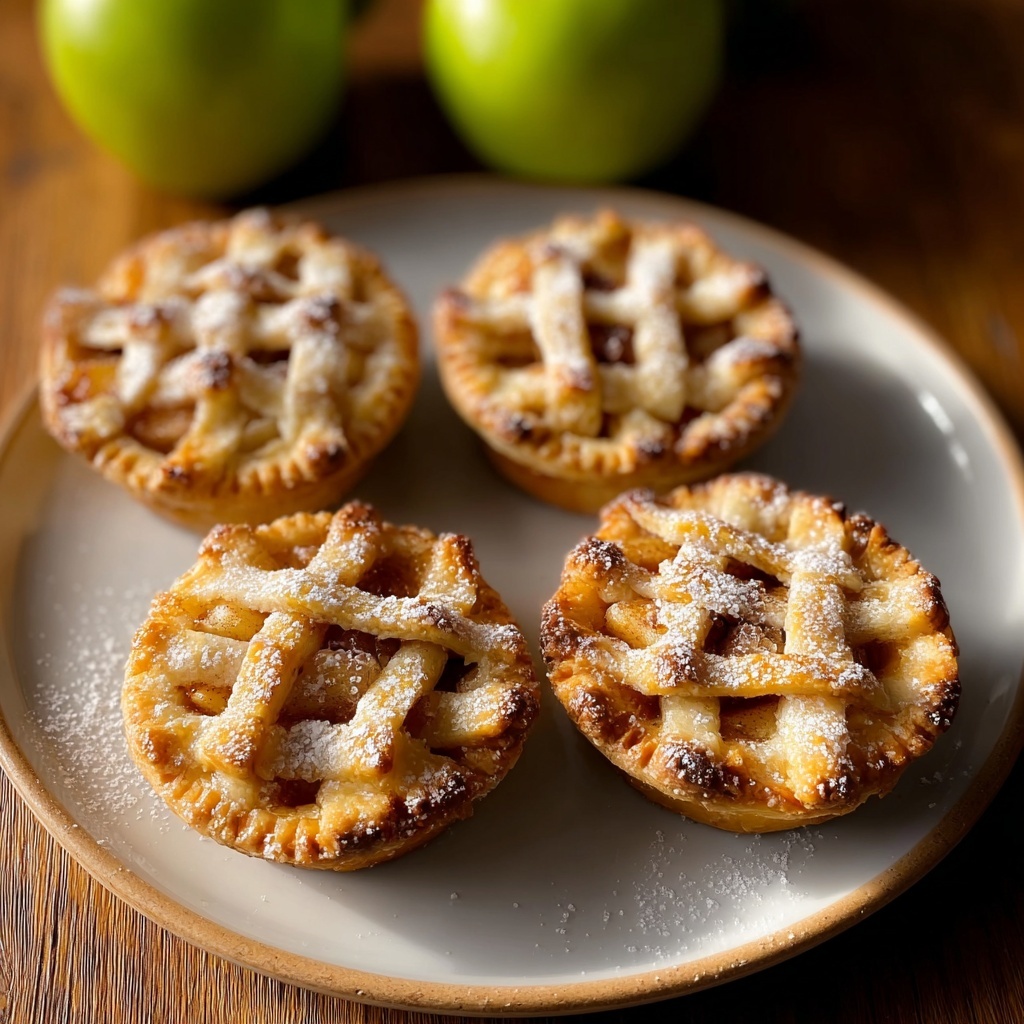
If you’re looking for a delightful little treat that brings the cozy flavors of fall right to your fingertips, this Mini Apple Pies Recipe is an absolute winner. These tiny pies are bursting with sweet, cinnamon-spiced apple filling wrapped in flaky, golden crusts that bake up perfectly every time. Whether you’re craving a comforting snack, impressing guests, or just want a fun baking project, this Mini Apple Pies Recipe promises warm, juicy bites of apple goodness that feel homemade and special with every mouthful.
Ingredients You’ll Need
The magic of this Mini Apple Pies Recipe lies in its simple, carefully chosen ingredients that work together to create sweet, tender filling and a crisp, buttery crust. Each element is essential—from the tartness of fresh apples to the aromatic cinnamon, and the buttery pie crust that holds everything together perfectly.
- 2 large apples: Peeled, cored, and diced to tender, juicy perfection for the filling.
- 1/4 cup granulated sugar: Adds just the right amount of sweetness to balance the tart apples.
- 1/2 teaspoon ground cinnamon: Brings warmth and classic apple pie flavor.
- 1 tablespoon all-purpose flour: Helps thicken the apple juices so the filling isn’t runny.
- 1 tablespoon lemon juice: Keeps the apples bright and adds a subtle tang.
- 1 teaspoon vanilla extract: Enhances the natural sweetness and aroma of the filling.
- 1 package refrigerated pie crusts: Provides an easy, flaky base for the mini pies without fuss.
- 1 egg, beaten: Used for egg wash that makes the crust beautifully golden and shiny.
- 1 tablespoon unsalted butter: Dotted on top of the filling for rich flavor and extra moisture.
- Turbinado sugar (optional): Sprinkled on top for a delightful crunch and sparkle.
How to Make Mini Apple Pies Recipe
Step 1: Prepare Your Oven and Baking Sheet
Start by preheating your oven to 375°F (190°C) and lining a baking sheet with parchment paper. This sets the stage for even baking and easy cleanup, so your mini pies come out perfect every time.
Step 2: Mix the Apple Filling
In a medium bowl, combine your diced apples with sugar, cinnamon, flour, lemon juice, and vanilla extract. Stir until the apples are evenly coated, creating a well-balanced filling that’s sweet, warm, and ready to shine inside the crust.
Step 3: Cut Out Dough Circles
Roll out your refrigerated pie crusts on a lightly floured surface. Use a round cookie cutter or the rim of a glass to cut about 4-inch diameter circles. These will be the little shells that hold your amazing filling.
Step 4: Add Filling and Butter
Place one tablespoon of apple filling in the center of each dough circle. Don’t forget to dot each with a small piece of butter—this adds richness and helps the filling stay moist and luscious as it bakes.
Step 5: Seal the Pies
Brush the edges of each circle with beaten egg, then fold the dough over the filling to form a half-moon shape. Press the edges firmly with a fork, sealing in the delicious filling so nothing leaks out during baking.
Step 6: Prepare for Baking
Transfer the mini pies to the lined baking sheet. Brush the tops with the remaining egg wash for a golden finish and sprinkle with turbinado sugar if you want a little extra sparkle and crunch.
Step 7: Vent and Bake
Cut small slits on the tops of each pie to let steam escape and prevent sogginess. Then, bake for 20-25 minutes until the crusts turn golden brown and the filling is bubbling with sweet, cinnamon-scented goodness.
Step 8: Cool and Enjoy
Remove the pies from the oven and allow them to cool slightly on a wire rack. This lets the filling thicken up just right, so every bite is perfectly satisfying.
How to Serve Mini Apple Pies Recipe
Garnishes
Add a scoop of vanilla ice cream, a dusting of powdered sugar, or a drizzle of caramel sauce to your mini apple pies. These simple touches elevate the cozy flavors and make each serving a little celebration in itself.
Side Dishes
Pair your mini pies with a warm cup of spiced cider or hot tea for a comforting snack break. They also work wonderfully alongside a salted caramel latte or a creamy chai for balance and warmth.
Creative Ways to Present
Arrange these mini pies on a rustic wooden board or pretty serving platter with fresh apple slices and cinnamon sticks as decoration. They also make charming individual desserts at parties when served in small paper liners or mini pie tins.
Make Ahead and Storage
Storing Leftovers
Store any leftover mini apple pies in an airtight container at room temperature for up to two days. This keeps the crust crisp and the filling fresh, so they’re still delicious when you enjoy them the next day.
Freezing
You can freeze the unbaked mini pies by placing them in a single layer on a baking sheet until solid, then transferring to a freezer-safe bag or container. Bake them straight from the freezer, adding a few minutes to the baking time for convenience.
Reheating
To bring back that fresh-baked warmth, reheat mini pies in a 350°F oven for about 10 minutes. Avoid microwaving if possible, as it can make the crust soggy and less enjoyable.
FAQs
Can I use other types of apples for this Mini Apple Pies Recipe?
Absolutely! Tart apples like Granny Smith work well, but you can experiment with Fuji or Honeycrisp to vary sweetness and texture according to your preference.
Is it necessary to use refrigerated pie crust?
While homemade pie crust adds charm, refrigerated pie crusts are a fantastic shortcut that still delivers flaky, buttery results—especially handy for quick baking sessions.
Can I make these mini pies vegan?
Yes! Substitute the butter with a plant-based alternative and use a dairy-free pie crust. Replace the egg wash with a plant milk or maple syrup glaze to get that lovely crust shine.
How long do mini apple pies last once baked?
They are best enjoyed within two days when stored at room temperature. Beyond that, the crust tends to lose its crispness, but warming them up helps revive some texture.
Can I add nuts or raisins to the filling?
Definitely! Chopped walnuts or pecans add a delightful crunch, and raisins add extra sweetness and chewiness. Add them to the filling mixture before assembling the pies.
Final Thoughts
There’s something truly special about making and sharing a Mini Apple Pies Recipe that blends tradition, warmth, and simple homemade goodness. Whether you bake them for yourself or to delight friends and family, these charming little pies will fill your kitchen with irresistible aromas and your heart with joy. Trust me—you’re going to want to keep this recipe close and make it again and again.
Print
Mini Apple Pies Recipe
- Prep Time: 20 minutes
- Cook Time: 25 minutes
- Total Time: 45 minutes
- Yield: 8 mini pies
- Category: Dessert
- Method: Baking
- Cuisine: American
Description
These Mini Apple Pies are delightful single-serving pastries filled with a sweet and spiced apple mixture. Perfect for a cozy dessert or snack, they feature a crisp, golden crust with a fragrant cinnamon and vanilla-infused apple filling. Made using refrigerated pie crusts for convenience and baked to perfection, these charming pies are an easy treat to delight family and friends.
Ingredients
Filling
- 2 large apples, peeled, cored, and diced
- 1/4 cup granulated sugar
- 1/2 teaspoon ground cinnamon
- 1 tablespoon all-purpose flour
- 1 tablespoon lemon juice
- 1 teaspoon vanilla extract
Pie Crust and Assembly
- 1 package refrigerated pie crusts (usually contains 2 crusts)
- 1 egg, beaten (for egg wash)
- 1 tablespoon unsalted butter, cut into small pieces
- Turbinado sugar for sprinkling (optional)
Instructions
- Preheat Oven: Preheat the oven to 375°F (190°C). Line a baking sheet with parchment paper to prevent sticking and ensure easy cleanup.
- Prepare Apple Filling: In a medium bowl, combine the diced apples with granulated sugar, ground cinnamon, all-purpose flour, lemon juice, and vanilla extract. Mix well until the apples are evenly coated with the mixture, ensuring a flavorful filling.
- Cut Pie Dough Circles: Roll out the refrigerated pie crusts on a lightly floured surface to avoid sticking. Use a 4-inch diameter round cookie cutter or glass rim to cut circles from the dough for individual pies.
- Assemble Mini Pies: Place about one tablespoon of the apple filling onto the center of each dough circle. Dot each with a small piece of unsalted butter to add richness as it bakes.
- Seal the Pies: Brush the edges of each dough circle with the beaten egg to help seal. Fold over the dough to create a half-moon shape, enclosing the filling. Press edges firmly with a fork to ensure a tight seal and prevent leakage during baking.
- Prepare for Baking: Transfer the prepared mini pies onto the lined baking sheet. Brush the tops with the remaining beaten egg to promote browning. Optionally, sprinkle with turbinado sugar for added texture and sweetness.
- Vent the Pies: Cut small slits on the top of each pie to allow steam to escape while baking, which helps the pies bake evenly without bursting.
- Bake: Bake in the preheated oven for 20-25 minutes until the crust turns golden brown and the apple filling is bubbly, indicating it is cooked through.
- Cool and Serve: Remove the pies from the oven and transfer them to a wire rack. Let them cool slightly before serving to set the filling and avoid burns.
Notes
- You can use any variety of apples, but tart varieties like Granny Smith work well to balance the sweetness.
- For a dairy-free version, substitute the butter with a vegan butter alternative and skip the egg wash or use a plant-based milk wash.
- Make sure to seal the edges well to avoid filling leakage during baking.
- These pies can be stored in an airtight container at room temperature for up to 2 days or refrigerated for up to 4 days.
- Reheat leftovers in a warm oven for crispiness rather than microwaving to maintain texture.


