
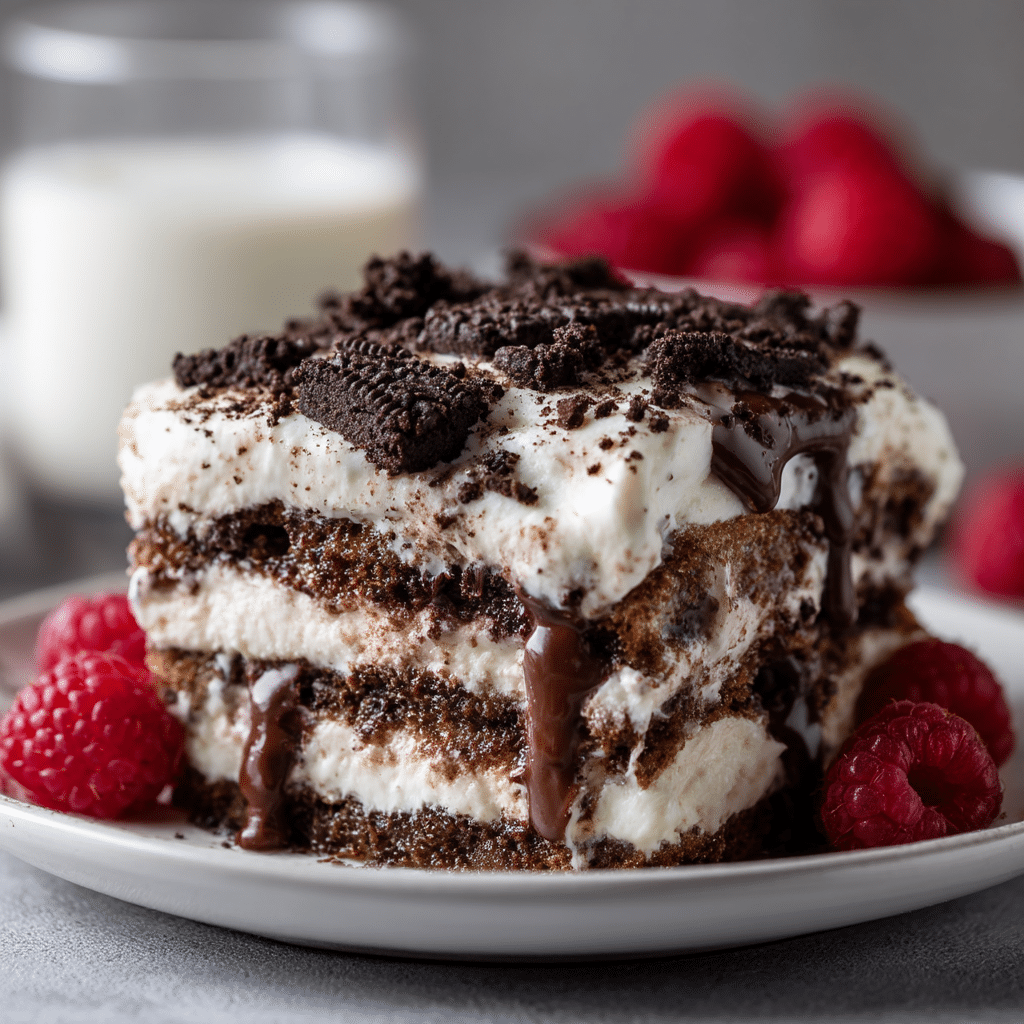
This Ice Cream Sandwich Cake is the ultimate no-bake dessert for summer—or honestly, any time you need something sweet, fun, and unbelievably easy to make. Layers of soft ice cream sandwiches, fluffy whipped topping, gooey fudge, and crunchy cookie crumbles come together in a dessert that feels indulgent and nostalgic all at once. It’s a total crowd-pleaser and a lifesaver when you’re short on time but still want to wow your guests or treat your family. Plus, it only takes about 10 minutes to assemble!
Why You’ll Love This Recipe
- No Baking Required: Absolutely zero oven time. Just layer, freeze, and enjoy.
- So Easy It’s Almost Foolproof: If you can unwrap an ice cream sandwich, you can make this cake. That’s how simple it is.
- Customizable: Switch up the flavors, toppings, or sauces depending on your mood or what you’ve got in the pantry.
- Make-Ahead Friendly: Assemble it the night before and let it chill overnight—no last-minute prep needed.
Ingredients You’ll Need

Grab these simple ingredients to build your dreamy ice cream sandwich cake:
- Ice Cream Sandwiches: The classic kind with vanilla ice cream and soft chocolate cookies work best—they layer perfectly and soften just right.
- Whipped Topping: Use store-bought whipped topping like Cool Whip for ease. Let it thaw before using for smooth spreading.
- Chocolate Fudge Sauce: Adds that rich, indulgent chocolate layer. Warm it slightly to make spreading easier.
- Caramel Sauce: Optional, but it adds a lovely sweet and buttery contrast to the fudge.
- Crushed Cookies or Candy: Think Oreos, peanut butter cups, or crushed M&Ms for texture and a pop of flavor on top.
- Sprinkles: Totally optional, but they make the cake look festive and fun—especially for birthdays or celebrations.
Variations
Want to make this cake your own? Try these fun twists:
- Mint Chocolate: Use mint ice cream sandwiches, mint fudge sauce, and crushed mint cookies on top.
- Peanut Butter Lovers: Drizzle peanut butter sauce between layers and top with chopped peanut butter cups.
- Berry Delight: Swap caramel for raspberry sauce and sprinkle with fresh berries between layers.
- S’mores Version: Use graham cracker ice cream sandwiches, add a marshmallow layer, and top with mini chocolate chips.
How to Make Ice Cream Sandwich Cake
Step 1: Prepare Your Base Layer
In a 9×13-inch dish or a similar freezer-safe pan, lay down a single layer of ice cream sandwiches side-by-side. You may need to trim a couple to fit your dish perfectly.
Step 2: Add the First Layer of Toppings
Spread a thick layer of whipped topping over the ice cream sandwiches. Drizzle generously with chocolate fudge sauce and a bit of caramel sauce if using. Sprinkle crushed cookies or candy over the top.
Step 3: Repeat the Layers
Add a second layer of ice cream sandwiches on top of the first layer. Repeat the whipped topping, fudge, caramel, and crushed cookie process.
Step 4: Final Layer and Garnish
Top everything with one last layer of whipped topping. Decorate with more crushed cookies, candy, and sprinkles if desired. The more festive, the better!
Step 5: Freeze
Cover the cake tightly with foil or plastic wrap and freeze for at least 4 hours, preferably overnight, to let the layers firm up and flavors meld together.
Step 6: Slice and Serve
Before serving, let the cake sit at room temperature for 5–10 minutes to make slicing easier. Cut into squares and dig in!
Pro Tips for Making the Recipe
- Work Quickly: The sandwiches melt fast, so keep your toppings and tools ready before you start layering.
- Line the Pan: Use parchment paper or foil for easier lifting and cleaner slices.
- Smooth Spreading: Let the whipped topping and sauces come to room temperature slightly so they spread more easily without tearing the sandwiches.
- Layer Creativity: Don’t be afraid to add chopped nuts, mini marshmallows, or even crushed cereal between the layers for added crunch and surprise.
How to Serve
This cake is a hit at BBQs, birthday parties, or any casual get-together. It’s best served straight from the freezer, sliced into squares. Pair it with:
- A hot cup of coffee or iced latte for a perfect contrast
- A drizzle of extra chocolate or caramel sauce on the plate for an elegant touch
- A scoop of flavored whipped cream or a fresh berry garnish for a fruity note
Make Ahead and Storage
Storing Leftovers
Wrap the leftover cake tightly with plastic wrap or store it in an airtight container in the freezer. It’ll stay delicious for up to 5 days.
Freezing
This cake freezes beautifully. Make it up to 3 days in advance, and it’ll be just as good—if not better—by the time you serve it.
Reheating
No need to reheat—this is a straight-from-the-freezer dessert. Just let it sit at room temp for 5–10 minutes before slicing for easier serving.
FAQs
Can I use homemade whipped cream instead of store-bought topping?
Yes, absolutely. Just make sure your whipped cream is stabilized with a bit of powdered sugar or gelatin so it doesn’t collapse when frozen.
Do I need a specific brand of ice cream sandwiches?
Nope! Any standard rectangular ice cream sandwich will work. Some come with different flavors—vanilla, chocolate, even Neapolitan—so feel free to experiment.
How do I keep the cake from getting too hard to cut?
Let it sit at room temperature for a few minutes before serving. You can also run your knife under hot water and wipe it dry before each slice.
Can I make individual servings instead of a large cake?
Definitely! Layer the ingredients in small loaf pans or even muffin tins with liners to make mini versions—great for parties or portion control.
Final Thoughts
This Ice Cream Sandwich Cake is the kind of dessert that makes you feel like a kid again—fun, unfussy, and full of flavor. Whether you’re celebrating something special or just want a cool treat on a hot day, this recipe delivers every time. Go ahead and give it a try—it’s impossible not to love!
PrintIce Cream Sandwich Cake Recipe
A decadent, no-bake ice cream cake made by layering ice cream sandwiches with creamy whipped topping and fudge sauce, perfect for hot days and quick desserts.
- Prep Time: 15 mins
- Cook Time: 0 mins
- Total Time: 4 hrs 15 mins
- Yield: 12 servings 1x
- Category: Dessert
- Method: No-Bake
- Cuisine: American
- Diet: Vegetarian
Ingredients
- 12 store-bought ice cream sandwiches
- 2 cups (480 ml) whipped cream or whipped topping
- 1/2 cup (120 ml) hot fudge sauce
- 1/4 cup chocolate chips (optional)
- 1/4 cup chopped nuts (optional)
- 1/2 cup sprinkles (optional)
Instructions
- Line a 9×5-inch loaf pan with plastic wrap, leaving an overhang on all sides.
- Place 6 ice cream sandwiches in a single layer in the bottom of the pan, trimming to fit if necessary.
- Spoon 1 cup of whipped cream evenly over the sandwiches and smooth the top with a spatula.
- Drizzle half of the hot fudge sauce over the whipped cream.
- Arrange the remaining 6 ice cream sandwiches on top of the fudge layer.
- Spread the remaining whipped cream over the top layer, then drizzle with remaining hot fudge sauce.
- Sprinkle chocolate chips, nuts, and sprinkles over the top, if desired.
- Fold the plastic wrap over the top to cover and freeze for at least 4 hours or until firm.
- Remove from freezer 10 minutes before serving. Use the plastic wrap to lift the cake from the pan, unwrap, slice, and serve immediately.
Notes
- You can use any flavor of ice cream sandwiches for variety.
- Substitute whipped cream with Cool Whip or another whipped topping if preferred.
- Letting the cake sit at room temperature for a few minutes makes slicing easier.
- Customize toppings with crushed cookies, caramel sauce, or fresh fruit.
- Store leftovers covered in the freezer for up to 1 week.
Nutrition
- Serving Size: 1 slice (approx. 100 g)
- Calories: 350 kcal
- Sugar: 25 g
- Sodium: 200 mg
- Fat: 18 g
- Saturated Fat: 11 g
- Unsaturated Fat: 6 g
- Trans Fat: 0.5 g
- Carbohydrates: 40 g
- Fiber: 1 g
- Protein: 5 g
- Cholesterol: 45 mg